Monday, June 30, 2014

Final countdown

T minus eighteen hours until my first day as a doctor--specifically, as an intern, the juniormost workhorse of all hospital workhorses. I've got a few goals for this year, other than that whole "do no harm" bit. The most serious is to improve the sense of clinical intuition that all great attendings seem to have in spades. I remember the first time I (accurately) had that sensation, and how rewarding it was: a very intelligent, well-spoken, healthy and spry elderly gentleman in the ER with a couple days of "gastroenteritis" who, despite his protestations that he just felt dehydrated from all the vomiting, didn't look quite right to me. I'll spare you the HIPAA violation, but in short, he ended up being admitted to the medicine floor and quickly escalated to the ICU for something much more significant and unusual than gastroenteritis. It was incredibly gratifying to be rewarded for pursuing more thorough investigations than the chief complaint warranted on the basis of a few physical exam findings and an odd sense of disquiet.

My least serious goal: stay physically fit. The long, meandering walks I've been taking can't continue--at least not at their current frequency--but I'm determined to resist the pull of takeout and free conference food and cafeteria snacks. To help myself along both physically and financially, I've come up with a recipe for protein bars that are neither disgusting nor candy bars in disguise.


I'm sure I'm not the only one who has gone through the drugstore/grocery store/Bellevue gift shop ritual of painstakingly reading the nutrition facts of each brand of protein bar on offer, calculating protein:calorie, protein:sugar, and protein:dollar ratios. Most of them are... well, let's just say unsatisfactory, and some of the ones that aren't taste like chalk. The Bellevue gift shop has some good options, including MetRx and Protein Plus, (my personal favorite both for the taste and the absolutely fantastic ratios). But even buying Protein Plus bars in bulk, which we did to bring to Iceland, gets a little pricey. The date bars I've used in the past for on-the-wards snacking are more expensive, more messy, more time-consuming, and more carbohydratey than these puppies... I'm a convert.

WolframAlpha has a nifty function that, given ingredient inputs, will output a thorough nutrition profile of the total. These have, minus the optional chopped nuts and dried fruit but including the optional oats, about 206 calories, 20 g protein, 14 g carbs, and 10 g fat per serving. Of course, most of the 6 g of sugar comes from the chocolate chips, and most of the fat from the nut butter; if you wanted to be really crazy, you could reduce or omit those ingredients, but of course, those are the tastiest elements!

Extra-chocolatey protein bars

30 g (1/4 to 1/3 c) raw almonds
optional: 20 g (1/4 c) oats
30 g (1/4 c) cocoa powder
1/4 c semi- or bittersweet chocolate chips (can up to 1/3 if you like a sweeter bar)
3 tablespoons nut butter (preferably not the processed, sweetened type)
3/4 c vanilla protein powder
1/2 c chocolate protein powder
nondairy milk
optional: assorted chopped nuts and dried fruit

In a food processor or blender, grind the almonds and oats, if using, until they are mostly the texture of coarse sand; you don't want it to be completely ground just yet. Add in the cocoa and chocolate chips and pulse until blended together. Dump into a bowl and add the protein powders and nut butter. Slowly add the nondairy milk, blending with a spatula, until the mixture becomes a thick, somewhat tacky dough. Line a square pan with parchment paper, with enough overhang to completely cover the pan when folded over. Sprinkle the chopped fruit/nuts on evenly, if using. Pat in the dough and fold the parchment over it. With your hands, pat and spread the dough until it completely fills the pan and covers the chopped fruit/nut layer. Freeze or refrigerate until firm, then cut into 8 pieces; I like to keep mine frozen so they stay cold until I'm ready to eat them at work.

Wednesday, June 25, 2014

Leftovers

Way to forget to post this for several days, Hannah.

It's generally easy to avoid owning single-purpose kitchen items when your kitchen is the size of most people's closets. You just have to think, "Will I be able to fit my hand in the drawer if I purchase this? No? Am I willing to throw something away in order to own it? No? Back on the shelf." (Exceptions: I do own a mandoline, to make up for my amateur knife skills, and a KitchenAid pasta attachment, because fresh pasta needs no excuses.)

Much more difficult is avoiding single-purpose ingredients. You know what I mean: those extracts and vinegars and cheeses that one and only one recipe requires. Plenty of times I'll concoct a substitute or just move on to the next recipe--I'm looking at you, black vinegar--but sometimes I just have to have it. Thus the head of black garlic that's been languishing in my fridge for months. Thus my habit of allowing a couple stray ounces of goat cheese to go crusty, because who can finish a log of goat cheese that fast, anyway?

But no more! Time to use up a lot of black garlic!

This is black garlic cod with mushroom agnolotti, frizzled kale, and a celeriac and parsley puree.


Have a quick agnolotti tutorial:

Agnolotti can be folded-over squares or circles; I went for
squares, not in the least because it gave me an excuse to buy
a square cutter (for a dollar!) that will really help with biscuits.
The dough is an egg-enriched pasta rolled out to the second-
thickest setting on my KitchenAid.

Place a quarter-teaspoon of filling slightly off-center toward
one of the points. Trust me when I say that's enough filling.

And fold over, pressing around the daub of filling to get out
all the air. Seal with a little water if necessary.

I also did a black garlic chocolate budino with raspberry red wine coulis and a crunchy hazelnut biscuit (which was supposed to be a tuile, but I decided to try a new recipe that did not tuile at all). It was pretty transcendental... so transcendental that we gobbled it down before taking pictures. Ditto the pad see ew made two days ago, and the blueberry pie with the best filling I've ever done (red wine, leftover raspberry coulis, and allspice in the filling, as well as a bit of ground tapioca for texture; the tapioca or tapioca flour can be found in the bulk section of your local food coop or, likely, Whole Foods).

And I also made goat cheese gnocchi to use up the aforementioned goat cheese. No pictures; just recipe.

Goat cheese gnocchi

7 oz goat cheese, slightly cooler than room temp
3 egg yolks
125-150 g flour (1 cup ish, if you don't have a scale)
salt and pepper

Cream the goat cheese and egg yolks until thoroughly combined. Gradually add the flour until the dough is tacky but able to be handled; salt and pepper to taste. Do not overwork, or the gnocchi will be dense and tough. Chill for at least 30 minutes, 1 hour preferred.

There are a few techniques for creating the dumplings: rolling little snakes of dough and cutting off snippets, squirting them out of a pastry bag, or rolling them gently between your floured palms. I prefer the third option; I am unable to get fluffy gnocchi with the first technique for some reason, and I hate cleaning pastry bags. Do whichever you prefer. Roll the finished dumplings over a fork to get the classic ridged appearance.

Bring a pot of salted water to a rolling boil. Boil the gnocchi until they float, at which point they should be cooked through but tender to the tooth. Optionally, sear in a buttered pan before serving.

Saturday, June 21, 2014

Great finds

There was callaloo at the Dag Hammarskjold Plaza Greenmarket!


Callaloo can actually refer to several plants; this is amaranth (which can also be called Caribbean spinach, water spinach, or Jamaican spinach). I've eaten it before, but never had a chance to cook with it. The way callaloo is prepared varies by country, of course, but it's frequently combined with okra, "creamed" with coconut milk, or simply steamed. In this case, I cooked it with tomatoes, onions, carrot, and a lot of garlic... and photographed it with a wobbly camera with a pen stuck in the missing battery cover slot. Sigh. So much for photo quality.

Sorry for potato quality.
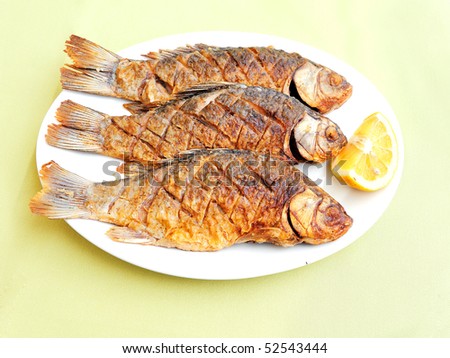
I chose to put it with a whole roasted jerk porgy (cheapest fish at the market, even if I did have to scale and gut it myself*), and searched the Internet until I found a relatively simple, clean jerk sauce recipe. It was really good... once I'd added coriander and muscovado, reduced the salt level, and cut back on the thyme a little bit. Unfortunately, I wrote down the alterations but closed the link--which was open in incognito mode for some reason--and can't find it again. Recipe comes with caveats; I hope I remembered it correctly!

Ditto with the apology.


A tropical meal needs a tropical dessert: mojito cupcakes. I can't stand rum, but there's something about a touch of rum (well, rum extract) in a cupcake...

Andy's camera did a little better...


Whole roasted jerk fish
1 2-lb fish, snapper if you want to pay for it
bay leaves
onion slices
lime slices
jerk sauce (see below)

Clean your fish well and pat the skin completely dry. Salt both sides lightly and let sit for 10-15 minutes, then wipe dry again. Stuff the fish with lime slices, onion slices, and 3-5 bay leaves. Make a series of shallow diagonal cuts in this pattern on either side of the fish. Coat thoroughly with jerk sauce on both sides and marinate for 30 minutes or so, flipping and re-coating once with sauce. Preheat the oven to 425. Roast the fish about 15 minutes, depending on the thickness, until just slightly underdone. At that point, turn the oven to broil in order to crisp the skin and finish cooking. Serve with a slice of lime.

Jerk sauce (I think)
1 small onion, chopped
3 scallions, chopped
1 tsp coriander
1 to 1 1/2 tsp nutmeg
1 1/2 to 2 tsp dried thyme
1 1/2 tbsp ground allspice
1 tbsp ground ginger
1 tbsp black pepper
1/2 tbsp muscovado or brown sugar
1 tbsp salt
1/2 habanero (or a little less than that of Scotch bonnet)
1/4 c white vinegar (might have been 1/2??)
2 tbsp soy sauce (might have been 1/4 c??)

Blend it all in a blender or food processor. Adjust salt level.

Callaloo and okra
3 cups okra, fresh or frozen/defrosted, sliced into 1-inch chunks
1 large bunch callaloo (mine was somewhat massive...)
1 small onion
2 tomatoes, chopped
5 cloves garlic (yes, 5), thinly sliced
1 carrot, finely chopped
oil or butter

Melt the oil/butter in a large saucepan. Saute the onions until translucent. Add garlic, carrot, and salt until onions are soft and garlic is fragrant. Add chopped tomatoes and okra; cook until juices release and tomatoes begin to break down. Add the callaloo and cook, stirring, until greens are tender. Salt and pepper to taste.

Mojito cupcakes
1/2 c butter, room temperature
2/3 c granuated sugar
1/3 c dark brown sugar
2 eggs
zest and juice of 2 large limes
fresh mint, finely minced
1/4 tsp rum extract (may increase to taste)
1/4 tsp vanilla extract
1 1/2 c all-purpose flour
1 1/4 tsp baking powder
1/2 tsp baking soda
1/4 tsp salt
1/4 c sour cream or yogurt
1/3 c milk

Mix dry ingredients together in a medium-sized bowl. Whisk yogurt/sour cream and milk in a separate container. In a large bowl, cream butter and sugars until fluffy. Add eggs, 1 at a time, followed by lime juice/zest, mint, and extracts. Alternate adding flour mixture and milk mixture, beginning and ending with flour mixture, blending just until combined. Fill lined cupcake tins a little over halfway each. Bake at 325 F for 18-22 minutes or until cupcakes spring back when lightly pressed. Cool completely before assembly.

To assemble, pipe or spread on the frosting and roll in or sprinkle the minty sugar rocks. Finish with a little grind of sea salt on top.

Minty sugar rocks
1 c sugar
1/3 c water
1/2 tbsp honey
1 c fresh mint
green food coloring (optional)
pinch salt

Put all ingredients in a small sauce pan and bring to a boil, whisking just until sugar is fully dissolved. Cook to the hard-crack stage (300-310 F), swirling occasionally. Immediately pour through a metal strainer onto a baking sheet lined with parchment paper, tipping the pan to spread sugar in an even 1/4-inch thick layer (although it doesn't really matter all that much, since you'll be grinding it anyway). Cool completely. Break up with a mortar and pestle or by hand.

Alternatively, see this link for making rock candy if you want a truly lovely topping and have a little foresight.

Mint lime frosting
1 stick butter, room temperature
1-2 tbsp heavy cream
zest and juice of 1 lime
3-4 tbsp finely chopped fresh mint
powdered sugar
1 pinch salt
optional: rum or rum extract

Cream together the butter, 1/4 c powdered sugar, heavy cream, lime juice zest, salt, and optional rum/rum extract. Continue to add powdered sugar to taste or texture. Keep chilled until ready to frost cupcakes.

*It's been awhile since I've cleaned a fresh fish, and I've never done so inside an edifice that I cared about keeping clean, much less a teeny-weeny New York kitchen. Scales. Scales everywhere.

Thursday, June 19, 2014

Deuteronomy 14:21

Riding home on the Megabus from Pittsburgh this past Sunday, I overheard a girl ask her new bus acquaintance what the difference between whiskey and bourbon is. He replied, with shocking confidence, that bourbon is aged in oak barrels, and whiskey is not. That's as false as he was sure about it. Whiskey can be aged in oak barrels. Bourbon, by law, must be aged in new charred oak barrels, made from at least 51 percent corn, and produced in the United States. There are some other differences involving what proof the alcohol must be and what can be added to it and so on. But it's the high percentage of corn, as opposed to a mash of other grains, that gives bourbon its distinctive sweetness.

Strictly speaking, corn is harvested in the early fall or late summer; fresh corn isn't at its peak yet in terms of sheer corniness (heh) and sweetness. The farmers market doesn't have it this early, of course, so I picked up a few ears from Fairway. Instead of cooking a kid in its mother's milk, I decided to cook corn in its progeny's milk, so to speak, to enhance the corn flavor and inject the sweetness that the corn lacks this early in the season.

My initial concept of the dish was confused. I couldn't decide if the flavors should be Southern, Turkish, Mexican. I bought and prepped a few more ingredients than I used, and used a couple things I shouldn't have. The recipe below is the ideal version, not the one actually marinating in my gastric juices*. A few points:

1. It's important not to overbrown the butter. Most pastry recipes that require browned butter direct you to cook it to "nut brown" or "deep brown," but since you'll be cooking a number of things in this, you don't want to risk burning the solids.
2. I know, I know, mint and paprika sounds like an odd combination. It's used frequently in Turkish and Syrian food, and it's fantastic. Open mind, please.
3. The one ingredient I wasn't sure whether to omit or not was kale. I chiffonaded about a cup of it and cooked the stems in the brown butter, then just stirred the kale in at the end. It made up for some of the earthy herbal flavors that, again, early corn kind of lacks, but on the other hand, maybe it just muddled the rest of the flavors. It's omitted in the recipe below.

Bourbon brown butter corn salad

4 ears corn
1.5 tablespoons butter
a little under 1 oz bourbon (I used half a nip of Jack Daniels, but didn't have anything volumetrically small enough to give it to you in mLs)
2 shallots, or 1 very small red onion
1/3 c chopped fresh mint
1/2 c toasted walnut halves
lime juice to taste
paprika, cayenne, salt, and pepper to taste

Brown the butter in a deep pan as directed above. Add the bourbon all at once and whisk vigorously until it stops sizzling. Fry the shallots/onion in this mixture until they're just short of burnt or, alternately, broil them until they're crispy and charred on top. Add the corn and stir to coat with the bourbon-butter sauce. Continue stirring over medium-high heat until it's just cooked. Remove from heat and add the mint, paprika, cayenne, salt, and pepper. Serve warm, adding lime juice and toasted walnuts just before serving.

*It has been pointed out to me that perhaps not everyone wants to think about the aftermath of eating in those terms...

Wednesday, June 18, 2014

Social media

I've been struggling with whether or not to continue this blog now that my stomach is actually MD*. There's plenty of identifying data on here, but on the other hand, nothing particularly offensive (I think... e-mail me if you disagree, of course!). Informal consultation with a few residents and one attending has convinced me that it's probably okay. A recent (er, not so recent now, I guess) position paper on the benefits and pitfalls of online activity for physicians is actually reassuring; I don't complain about patients, period, and don't plan to post anything particularly personal or embarrassing.

Unless you consider crostini of minted goat cheese spread and balsamic macerated cherries to be embarrassing.


I love macerated fruit (all fruit, in any form, to be fair). In particular, it's a great way to alter summer fruit in some way without taking away from the firm plumpness of it all like baking or stewing!


Protip: to easily halve and pit cherries, run a sharp paring knife all the way around the cherry lengthwise, then twist the two halves apart. They'll separate cleanly. Use your knife or fingers to flick the pit out of the half in which it's seated, and presto! Pitted halved cherry.


The bread is a simple country blonde from Flour Water Salt Yeast. Our super super, Peter, gave us a free window AC unit that one of his super friends didn't need, which will go a long way in increasing the frequency with which I bake, roast, and broil this summer. The bread was baked at 475, and broiled at an even higher temperature. Without the AC on, the apartment was nearly intolerable.

And now, have a bonus recipe for really good cookies.

Sesame-apricot cookies with the Momofuku technique

1 cup butter, room temperature
3/4 c white sugar
3/4 c packed brown sugar (I prefer light)
2 eggs
3/4 tsp vanilla extract (if you're not using almond, use a full tsp)
1/4 tsp almond extract
2 c flour
a scant 1 1/2 tsp salt
2 tsp baking powder
1 tsp baking soda
1/4 tsp cinnamon (can up to 1/2 for a more prominent flavor!)
1 c oats, not instant
Total of 2 c chopped dried apricots, white sesame seeds, and black sesame seeds, in your preferred ratios

Cream the butter and sugars in a stand mixer, if you have one. Add the eggs and vanilla and mix just until combined, scraping down the sides. Turn the stand mixer to medium-high speed (setting 4 on my KitchenAid) for a full 10 minutes, stopping halfway through to scrape down the sides. Add the flour, baking powder, baking soda, cinnamon, and salt, mixing just until combined, scraping down the sides. Finally, gently fold in the nuts/chocolate/fruit. Cover and chill the dough for at least 1.5 hours.

Preheat your oven to 375 F (original recipe on which I based this suggests 400, but I found that a bit too hot). Scoop out 1.5-tbsp scoops of dough onto a large cookie sheet, leaving at least 2 inches of space around each scoop. Grind a little kosher salt over the top. Bake 8-11 minutes. Note that the browning will start at the edges and rapidly move into the center; these cookies go from underdone to overdone in literally under a minute! Cool completely on the cookie sheet before serving.

*WOOOOOOOOO**
**Except I've yet to actually practice, sooo...

Wednesday, May 14, 2014

Ten tips for circumnavigating Iceland

1. Google Maps is bad at Iceland.

Unshockingly, I'm a planner, and delegated the job of Route Mapping to Andy prior to our departure. If we hadn't been handed Big Map at the rental car station, though, we would have had issues. Maybe it's because many things in Iceland appear to have the same name, or because the Ring Road/Route 1, the road vaguely encircling the country, has segments that go by different names entirely. The bottom line is: rely on Big Map and the local maps available at gas stations throughout the region.

2. Lodgings are plentiful, at least in the not-quite-on season.

The compulsion to plan also led me to pre-book all our stays at hostels. Only in Vik might this have been an issue (that hostel was hopping!), but even so, for just a bit more money in the not-quite-on season, you can stay at a variety of guesthouses and farm stays sprinkled throughout the country. If we'd had a little more flexibility, we might have chosen to stay at one of them in a more optimal location. Or camped. Speaking of which...

3. There is a delightful national system of icons representing resources available at... well, basically anywhere.

Here's an example taken from a stop at an information center (itself signified by a big letter I):


That cloverleaf thingy? Bane of my existence. It means "interesting site," and they're everywhere, and I couldn't see them all. Hrmpf.

As a more specific example, the signs for guesthouses (which are often indistinguishable from non-guest farmhouses otherwise) often have a bed (lodging), a cookpot (kitchen facilities), a crossed knife and fork (restaurant/cafe of some kind), and one or more other icons signifying available amenities or activities.

4. Eating out is very, very pricey. Go for the bread and soup.

No joke, we saw $16 toast and jam on one menu. In many restaurants, there is an option for all-you-can-eat bread and soup buffet for somewhere between $10 and $15. Do it, if you're eating out at all (certainly not necessary when there are so many well-kept hostel kitchens around!). It's delicious and warm and filling and certainly cheaper than almost anything else you can get.

5. While parts of Route 1 do close for the winter and for especially inclement weather, "open" in some of the more northerly segments involves wending in your two-wheel drive manual subcompact up a mountain road that is occasionally covered by snowdrifts. In a blizzard.

I'd post a picture of this except that a. it was basically whiteout dotted with lava and b. I was too busy suppressing the urge to keen with tension (thereby distracting Andy, who drove like a champ) to actually take pictures. Also, there were geese happily poking about in the frozen wasteland, with no liquid water in sight, and it was a little demoralizing.

6. There is a national hotline for road and weather conditions.

For those who aren't stupid enough to assume that "open" means "not terrifying."

7. Frequently, signs are posted 100-500 meters before the actual thing they're indicating.

This has a great summary of Icelandic road signs (and the icons I mentioned previously). It does not mention the above fact, however, one that resulted in some minor travel delays ("OH GOD TURN RIGHT NOW DO IT too late turn around.").

8. Most towns have an expensive sundlaug and a cheap sundlaug.

One of the places we went swimming/hot potting had the motto "Swimming Is Quality of Life" emblazoned on the wall. Even the smallest towns--or farmstays/guesthouses--take that to heart, which is delightful when all you want in between the morning hike and the evening hike is a long soak in a geothermal hot tub. Many of the even very small towns have a spa-like facility to which admission costs $20-$30 per person. The public pools may lack the luxury (sometimes, although frequently they're quite nice in and of themselves), but they cost $3-$6 per person. You might even get to sit in on a community water aerobics class!

9. Particularly in the not-quite-on season, facilities open late and close early. Hike in the morning, then visit things, then hike again in the evening.

Example: leave for hike at 9 a.m. Return at 1 or 2 p.m. Feast. Heitur pottur. More hiking.

10. Skyr tastes like, to borrow the words of Matthew Inman, the souls of ten thousand unborn panda bears.

Seriously, how does a variant of yogurt taste that good? How? And where can I get more of it?

So yeah, Iceland was cool (no pun intended). Favorite points: towns composed of weathered clapboard buildings have awesome modernist churches, no exception (see: Blonduos, a particular favorite of mine); in the East, one must share the road with reindeer; and everywhere, the coffee flows freely. Here, have a picture of a lake with icebergs in it!


Saturday, April 12, 2014

Riding the High

Smiling medical students: not something one often encounters, not unless you count the "it's-early-in-the-morning-but-I-need-to-be-enthusiastic-to-get-honors" fixed grin. Match Day was a different story. My classmates matched incredibly well, and they all looked so, so happy. It'll continue to warm my cold, puckered ticker for some time; I'm smiling now just thinking of it.

Match Day was three weeks ago now, but my last day of medical school wasn't until yesterday. I've been on a second rotation in the medical ICU and loved it just as much as the first one, perhaps more (it helped that neurology knowledge came in handy). I'm not sure whether to be excited or not. Med school was frustrating, exhausting, embarrassing, devastatingly expensive, and totally awesome. Intern year is supposed to be the first three of those. I'll let you know in July.

To commemorate the Fin de Med School, I made these MICU-themed lime cream tarts. The writing is messier than I would have liked because I forgot to pick up some 12-cc syringes from the utility cart on my way home and had to use a much too large one that I had at home. It was much harder to control the flow of chocolate.


To make these, fill pre-baked tart shells (or shell) with slightly warm curd, then refrigerate the whole thing until the curd is firm or sliceable. I view using condensed milk for citrus pies as cheating; the turnabout is that it's a little harder to get a pie that slices instead of oozing.

Lime curd
 
3-4 limes, or enough for 1/2 cup juice
1 to 1 1/4 cups white sugar (I like a more sour curd and use less sugar)
4 oz (1/4 lb, or 1 stick) unsalted butter, room temperature
4 eggs, room temperature
pinch salt
 
To fully juice the limes, warm them slightly in the microwave before squeezing. Using an electric mixer or stand mixer, cream the butter and sugar with the zest from 4 limes. Add the eggs 1 at a time, mixing until just blended, then add the lime juice and salt and mix until just combined.
 
Pour into a saucepan and cook over medium-low heat, whisking constantly, until thickened. If you have a food thermometer, this will occur at about 175 F; otherwise, cook until it is just below a simmer. This will take slightly longer if you used less sugar, but generally will be 10-15 minutes. Allow to cool until still warm, but easily handled. Pour into the cooled crust and allow to cool fully to room temperature, then refrigerate. I find that the pie cuts best after setting in the fridge for at least an hour, but it's not necessary. To mix it up, toss some fresh mint into the curd as it cools (and fish out the herbs afterwards) or add some cinnamon, cloves, or black pepper.