Proteases are fun! A protease is an enzyme that breaks down protein by destroying the linkages between amino acids. Proteases destroy those linkages, which are called peptide bonds, via hydrolysis, in which the oxygen of one of our cells' oh-so-abundant water molecules stuffs its way into a chemical bond, booting off one of the components (in not-quite-accurate layman's terms, that is, but it'll do). One of the more interesting things about many proteases is the catalytic triad, or a trio of amino acids that work together to catalyze, or speed up, this hydrolysis. Their chemical and biological mechanisms are pretty nifty (particularly the classic serine-histidine-aspartate triad), but what is even cooler is that species all over the genetic map possess proteases with catalytic triads in a beautiful example of convergent evolution. What this means is that the catalytic triad arose independently about two dozen times because of the sheer chemical elegance of those arrangement(s). Even better, some species of protease-packed plants are edible.
Kiwi, papaya, and pineapple are some of the most notable protease-containing foods; nota bene that none of them can be set in gelatin unless canned or otherwise preserved first, since the peptide bonds that give gelatin its structure will rapidly be destroyed. Industrially, the papaya protease--conveniently named papain--is used as a meat tenderizer. Ficin, a protease derived from the fig tree itself rather than the fruit, can also do this.
"Yes, Hannah," you're saying. "I know all about papain, and pineapple's ability to dissolve gelatin has been the bane of housewives since the 1950s." Fine. But did you know that everyone's favorite rhizome also contains a protease?
Ginger protease, or zingibain, can actually be used to make a milk pudding (or cheese, but that's another story). Here's how it works: normally, milk proteins called caseins aggregate into balls called micelles. Micelles of any sort have hydrophilic, or water-friendly, components on the outside, and hydrophobic components pointing inward. In this case, kappa-casein (heretofore written as K-casein) is on the outside of the micelles. Zingipain cleaves K-casein (specifically, at a proline residue), leaving a hydrophobic component called para-K-casein behind... and all of a sudden, those beautiful micelles stick together, and the milk sets.
Unfortunately, zingibain is a fairly tim'rous beastie. If heated above 150 Farenheit, it denatures--or loses its structure--almost completely, per this paper. It also degrades fairly quickly; the half-life is only 20 minutes at about 85 degrees Farenheit, but according to this paper, the addition of simple ascorbic acid--also known as vitamin C--dramatically increases that half-life. The science of that phenomenon is adequately explained in both the citations above.
That first paper also mentions that zingibain has its peak activity in a very narrow temperature window of 60 to 65 Celsius... and yet I saw so many recipes for this that called for milk to be "nearly simmering" or something like that. Sheesh. Break out the candy thermometer!
Ginger milk pudding
325 mL milk
40 g sugar
37 g ginger juice
In a small saucepan, mix the milk and sugar. Heat gently; you want to add the ginger juice at a target temperature of 145F. Meanwhile, grate the ginger (I used my delightful microplane) and squeeze out the juice using your hands, cheesecloth, or a strainer. When the milk and sugar are at the appropriate temperature, pour the ginger juice in over the surface of the milk and do not stir. Allow to set for about seven minutes, and enjoy the sweet taste of science.
Showing posts with label recipes. Show all posts
Showing posts with label recipes. Show all posts
Monday, January 5, 2015

Sunday, January 4, 2015
This year
Oh, John Darnielle, you and your eerily perfect combination of morbid and catchy. How do you do it? (Actually, morbid and New Year's Eve seem to go together in the arts; two of the numerous books I've recently finished feature terrible things happening to morally ambiguous people on that momentous occasion. Of the two, I'd more strongly recommend Ten Thousand Saints, by Eleanor Henderson. Despite my recent glut of books featuring tortured adolescent-to-young-adult male protagonists, its unique perspective on a more dangerous New York was striking, to say the least.)
Ringing in 2015 with this and other combinations... like elderflower, berry, and citrus. What's not to love about a berry pastry cream-filled Meyer lemon cupcake with fragrant St. Germain frosting and a sprinkle of toasted almonds to cut through all those florals?


Lemon cupcakes
2 sticks melted butter (room temperature) or oil
3/4 cup Meyer lemon juice
1/4 cup water
1 1/3 cups sugar
2 eggs
1/2 cup Greek yogurt
2 tsp vanilla
2 tbsp lemon zest
2 cups flour
3/4 tsp salt
1 1/2 tsp baking soda
Whisk the sugar into the butter/oil, then add the lemon juice, vanilla, water, yogurt, eggs, and lemon zest. Slowly whisk the dry ingredients into this mixture. Fill muffin tins 3/4 of the way to the top and bake at 350F for 15-20 minutes. DO NOT open the oven until at least 15 minutes have passed.
Berry pastry cream
10.5 oz milk
2 eggs
1 egg yolk
1 oz cornstarch
3 oz sugar
pinch salt
1/2 to 2/3 cup berry puree (I used frozen raspberries and blackberries)
1/8 tsp almond or vanilla extract
Heat the milk to simmering. Meanwhile, whisk together the eggs, cornstarch, sugar, and salt. When the milk is simmering, whisk a small amount into the egg mixture to temper, then a little bit more to ensure the egg mixture is warm. Whisk egg mixture into the remaining milk, and add the berry puree. Heat, whisking, until mixture is very thick and begins to bubble. When it does, cook for at least 1 minute, or until it no longer has the taste of raw cornstarch. Remove from the heat and whisk in the extract. Sieve into a container and press plastic wrap over the surface. Cool completely before using.
St. Germain Swiss meringue buttercream
2 egg whites
110 g, or about 1/2 cup, white sugar
1 stick butter, room temperature and cut into cubes.
pinch salt
2 or 3 teaspoons St. Germain, or to taste
Over a double boiler, whisk the egg whites and sugar until the mixture reaches 160F. Remove from the heat. Using a stand mixer, whisk the egg white/sugar mixture on medium speed until the mixture is cool and holds soft-to-medium peaks. Whisk in the butter, chunk by chunk. Keep whisking even if it looks curdled! When it has become homogenous and fluffy, add the pinch of salt and St. Germain, and continue to mix until optimal texture is achieved.
Ringing in 2015 with this and other combinations... like elderflower, berry, and citrus. What's not to love about a berry pastry cream-filled Meyer lemon cupcake with fragrant St. Germain frosting and a sprinkle of toasted almonds to cut through all those florals?
Lemon cupcakes
2 sticks melted butter (room temperature) or oil
3/4 cup Meyer lemon juice
1/4 cup water
1 1/3 cups sugar
2 eggs
1/2 cup Greek yogurt
2 tsp vanilla
2 tbsp lemon zest
2 cups flour
3/4 tsp salt
1 1/2 tsp baking soda
Whisk the sugar into the butter/oil, then add the lemon juice, vanilla, water, yogurt, eggs, and lemon zest. Slowly whisk the dry ingredients into this mixture. Fill muffin tins 3/4 of the way to the top and bake at 350F for 15-20 minutes. DO NOT open the oven until at least 15 minutes have passed.
Berry pastry cream
10.5 oz milk
2 eggs
1 egg yolk
1 oz cornstarch
3 oz sugar
pinch salt
1/2 to 2/3 cup berry puree (I used frozen raspberries and blackberries)
1/8 tsp almond or vanilla extract
Heat the milk to simmering. Meanwhile, whisk together the eggs, cornstarch, sugar, and salt. When the milk is simmering, whisk a small amount into the egg mixture to temper, then a little bit more to ensure the egg mixture is warm. Whisk egg mixture into the remaining milk, and add the berry puree. Heat, whisking, until mixture is very thick and begins to bubble. When it does, cook for at least 1 minute, or until it no longer has the taste of raw cornstarch. Remove from the heat and whisk in the extract. Sieve into a container and press plastic wrap over the surface. Cool completely before using.
St. Germain Swiss meringue buttercream
2 egg whites
110 g, or about 1/2 cup, white sugar
1 stick butter, room temperature and cut into cubes.
pinch salt
2 or 3 teaspoons St. Germain, or to taste
Over a double boiler, whisk the egg whites and sugar until the mixture reaches 160F. Remove from the heat. Using a stand mixer, whisk the egg white/sugar mixture on medium speed until the mixture is cool and holds soft-to-medium peaks. Whisk in the butter, chunk by chunk. Keep whisking even if it looks curdled! When it has become homogenous and fluffy, add the pinch of salt and St. Germain, and continue to mix until optimal texture is achieved.
Saturday, October 18, 2014
Where does the time go?

This circle contains such varieties as Enterprize, Liberty, TFO-1 (not as delicious as I'd hoped, given the exciting name), and Summergold. In one of my very few free days, I also found this massive Japanese radish that tasted great with apple and a miso-honey dressing.

Enough of produce, though. Andy recently earned a great academic distinction and, when asked how he wanted to celebrate, answered, "With nougat." Well, sir, then nougat you shall have.

I actually think the hazelnut mastiha nougat was the least delicious component of these homemade fancy Snickers. Out of impatience, I poured on the cayenne caramel layer before the nougat had fully dried, so it stayed kind of sticky even after the bars had set overnight.
There is a dollar store nearby that inexplicably sells Wilton candy molds for five to ten dollars. I seriously considered buying one in order to make these, but couldn't get over the stupidity of stuffing another implement into my overstuffed kitchen, so settled for ugly candy bars. Plus, I'm not sure if the dukkah and candied orange peel would have stuck had I used a mold. Next time, I may cut the bars before putting on the final layer of chocolate (super-dark 75%) so they look more like a real Snickers.
Of course, since candy for dinner is not healthful, I also made ravioli with a pumpkin, mascarpone, and harissa filling, and a spicy spinach fennel bechamel.


So good for you, I know.
Grown-up Snickers
Quality dark (very dark) chocolate
Dukkah (homemade, kicking around from when I made this amazing recipe)
Thinly sliced candied orange peel (I made my own in the microwave)
Line an 8x8 metal baking pan with parchment paper, molded tightly to the pan. Melt some chocolate (about 1/2 to 2/3 cup) and spread in an even layer on the bottom of the pan. Allow to cool completely, at least 1.5 hours, before you start the nougat.
Hazelnut nougat
1 cup granulated sugar
1/3 cup honey
1/4 cup water
1 large egg white
1/2 tsp vanilla extract
pinch salt
I cup chopped toasted hazelnuts
Optional: 3-4 grains mastiha
Over medium-low heat, whisk the honey, sugar, and water in a small saucepan until the sugar is melted. Cook without stirring until the syrup reaches 248F. Meanwhile, beat the egg white until it forms stiff peaks. When the syrup is ready, slowly pour into the egg white with the beater running (for which I used a stand mixture with the whisk attachment). Continue to beat until the candy is stiff but spreadable and lukewarm to room temperature. Fold in the nuts, salt, and vanilla, and spread over your first chocolate layer. Alternatively, only fold in the salt and vanilla, then sprinkle the nuts on top after you've spread it in (if you prefer to have the nuts embedded in the caramel). Allow to set completely--and here was my mistake, so please let it set for at least 6 hours--before preparing the caramel.
Cayenne caramel
2 tablespoons honey
3/4 cup granulated sugar
2 tablespoons water
1/4 tsp salt
1/2 tsp vanilla
1/2 cup heavy cream
2 tablespoons butter
cayenne pepper to taste (I like spicy, so I used lots!)
In a large pot or saucepan (at least 2 quarts), whisk together the sugar, water, and honey. Cook without stirring until the syrup is at 290F.
Meanwhile, mix the heavy cream, butter, and salt in a microwaveable container. Microwave until the butter is melted and the mixture is very hot, but do not allow it to boil. It should still be steaming by the time you're ready to add it to the syrup.
When the syrup is at temperature, remove it from the heat and slowly pour in the cream mixture, whisking constantly. It will bubble and sputter. When it is fully whisked in, cook without stirring over medium-high heat to 250F. Whisk in the vanilla and remove from the heat. Allow to cool for a couple minutes in the pot before you pour it over the nougat layer; it should still be spreadable, but not so hot that it melts the nougat.
Let the caramel set for at least 2.5 hours before you pour on the final chocolate layer. If you want to cut the bars first and dip them in the tempered chocolate, definitely let it set for a good 6 hours.
David Lebovitz has a great guide to tempering chocolate here. Do that, then pour over the caramel layer (or dip the bars in). Allow to set for 30 minutes or so, then sprinkle on dukkah (and a bit of sea salt if your dukkah is not salted) and some candied orange rind. Don't let it set too long or the toppings won't stick, but do wait a little while or the spices will just melt into the chocolate.
Saturday, September 27, 2014
A tale of two cakes
I've been cooking savories, really. There were the tempura shishito peppers...
 |
| These are so, so fun. |
 |
| The secret to good tempura batter: use carbonated water! |
 |
| Tempura kale for good measure. |
The carrot greens, bean sprout, and carrot salad with a fantastic avocado sesame dressing...

The vegetarian Cajun risotto...
But the Great Cake Experiment of Intern Year 2014... um... takes the cake. It all started when Andy requested a carrot cake*. It struck me that carrot cake doesn't taste all that much like carrots. Why not attempt another root vegetable cake that features the vegetable more prominently? So I made a control mini carrot cake:


And then a mini beet cake (Please excuse the decorations, which ended up resembling seaweed more than beet tops.):


I added some coffee to the batter to bring out the earthy, rather than the vegetal, quality of the beets, and used clove, caraway, and hazelnut extract. The carrot cake recipe on which I based the beet cake yielded a wet batter to begin with; the extra moisture added by the coffee made the texture just a wee bit odd. I can fix that. I want to fix that, because the flavor of this was so, so very good. This begs for a Swiss buttercream cream cheese frosting, lighter and tangier (and more heat-stable!) than your grandma's version.
Beet cake
2 cups all-purpose flour
2 tsp baking soda
1 cup granulated sugar
3/4 cup brown sugar, light or dark
1 tsp salt
1 tsp caraway
1 tsp cloves
1/2 tsp ginger
1 cup canola oil
1/2 cup lukewarm coffee, a dark roast if you have it
4 eggs
3 cups finely grated raw red beets
1/2 tsp hazelnut extract
Combine your dry ingredients in a medium-sized bowl. In a large bowl, whisk together the sugars and oil. Whisk in the eggs one by one until well-blended, then whisk in the coffee and extract. Add the dry ingredients and fold until not quite combined, then fold in the shredded beets (getting them a little floury keeps the beet from sinking to the bottom of the pan).
Grease and lightly cocoa** two 9-inch cake pans. Fill each with half the batter. Bake for 30-40 minutes each, or until a knife or toothpick inserted into the center of the layer comes out clean but moist. Cool 10 minutes in the pan, then turn out onto a rack to cool completely.
Cream cheese Swiss buttercream
2 egg whites
1/2 minus two tablespoons granulated sugar
1 cup unsalted butter, cool but soft
8 oz cream cheese, cool but soft
pinch salt
In a double boiler, whisk the egg whites and sugar together until sugar is dissolved and mixture is hot and foamy (160F, if you have a thermometer). Pour into a stand mixer and whip until the mixture is cool and forms stiff peaks. When the mixture is completely cool, start whipping in the butter about a tablespoon at a time. Don't get disappointed if it looks curdled; keep whipping! Do the same with the cream cheese, continuing to whip until everything is very fluffy. Add the salt just at the end.
Cajun risotto
1 onion
1 large green bell pepper
2 stalks celery
2 large cloves garlic
1 red bell pepper
1/2 cup white wine
dried thyme
Tabasco
Tony Chachare's
black pepper
1 1/2 cups Arborio rice
vegetarian andouille or similar sausage
chopped parsley
fresh lemon
about 5 cups mushroom or vegetable stock
Start to heat your stock with a large bay leaf in it. Dice the onion, pepper, and celery; all should be similar sizes. Mince the garlic. Finely chop the red bell pepper. In a large saute pan, heat about 3 tablespoons oil or butter. Add 3 tablespoons flour and stir constantly and vigorously as it cooks to a color just lighter than peanut butter. Add a couple tablespoons of stock and the onion, bell pepper, celery, and garlic and saute until the vegetables are soft. Add the rice and stir to coat, then add the white wine and stir until it is almost all absorbed. Begin adding the hot stock about a half cup at a time, stirring until it is almost absorbed each time. When done, the rice should have a bit of a bite without being chalky in the middle. About 7 minutes before you think it will be done, add in the red pepper and season with dried thyme, Tabasco, Tony's, and black pepper. Add the andouille and a squirt of lemon just at the end. Serve with lots of fresh parsley and a lemon wedge for squeezing.
*He loves "dense cakes," of which carrot cake is not an exemplar but which is nevertheless his favorite.
**If flour can be a verb, why can't cocoa?
The vegetarian Cajun risotto...
 |
| It all starts with a roux, and the true Cajun holy trinity: celery, onion, and green bell pepper. |
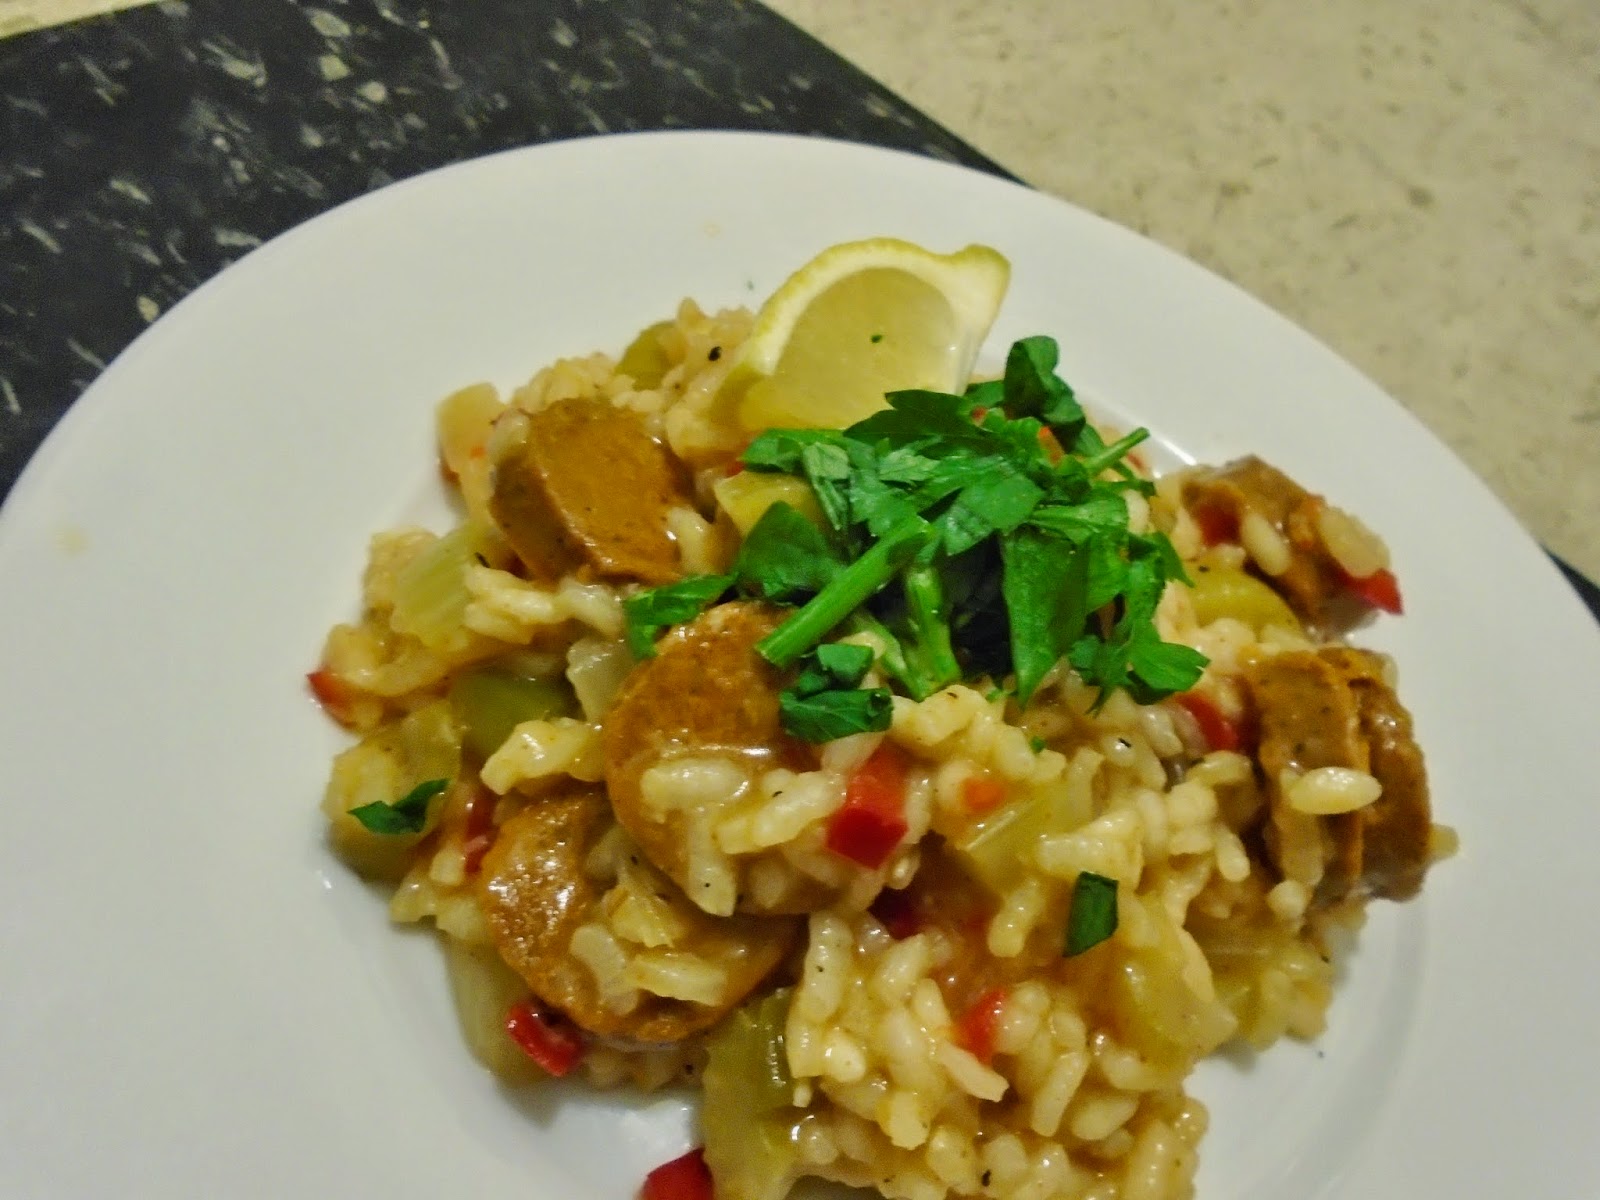 |
| A little white wine, Tabasco, and vegan andouille later... I cannot tell you how delicious this was. |
But the Great Cake Experiment of Intern Year 2014... um... takes the cake. It all started when Andy requested a carrot cake*. It struck me that carrot cake doesn't taste all that much like carrots. Why not attempt another root vegetable cake that features the vegetable more prominently? So I made a control mini carrot cake:
And then a mini beet cake (Please excuse the decorations, which ended up resembling seaweed more than beet tops.):
I added some coffee to the batter to bring out the earthy, rather than the vegetal, quality of the beets, and used clove, caraway, and hazelnut extract. The carrot cake recipe on which I based the beet cake yielded a wet batter to begin with; the extra moisture added by the coffee made the texture just a wee bit odd. I can fix that. I want to fix that, because the flavor of this was so, so very good. This begs for a Swiss buttercream cream cheese frosting, lighter and tangier (and more heat-stable!) than your grandma's version.
Beet cake
2 cups all-purpose flour
2 tsp baking soda
1 cup granulated sugar
3/4 cup brown sugar, light or dark
1 tsp salt
1 tsp caraway
1 tsp cloves
1/2 tsp ginger
1 cup canola oil
1/2 cup lukewarm coffee, a dark roast if you have it
4 eggs
3 cups finely grated raw red beets
1/2 tsp hazelnut extract
Combine your dry ingredients in a medium-sized bowl. In a large bowl, whisk together the sugars and oil. Whisk in the eggs one by one until well-blended, then whisk in the coffee and extract. Add the dry ingredients and fold until not quite combined, then fold in the shredded beets (getting them a little floury keeps the beet from sinking to the bottom of the pan).
Grease and lightly cocoa** two 9-inch cake pans. Fill each with half the batter. Bake for 30-40 minutes each, or until a knife or toothpick inserted into the center of the layer comes out clean but moist. Cool 10 minutes in the pan, then turn out onto a rack to cool completely.
Cream cheese Swiss buttercream
2 egg whites
1/2 minus two tablespoons granulated sugar
1 cup unsalted butter, cool but soft
8 oz cream cheese, cool but soft
pinch salt
In a double boiler, whisk the egg whites and sugar together until sugar is dissolved and mixture is hot and foamy (160F, if you have a thermometer). Pour into a stand mixer and whip until the mixture is cool and forms stiff peaks. When the mixture is completely cool, start whipping in the butter about a tablespoon at a time. Don't get disappointed if it looks curdled; keep whipping! Do the same with the cream cheese, continuing to whip until everything is very fluffy. Add the salt just at the end.
Cajun risotto
1 onion
1 large green bell pepper
2 stalks celery
2 large cloves garlic
1 red bell pepper
1/2 cup white wine
dried thyme
Tabasco
Tony Chachare's
black pepper
1 1/2 cups Arborio rice
vegetarian andouille or similar sausage
chopped parsley
fresh lemon
about 5 cups mushroom or vegetable stock
Start to heat your stock with a large bay leaf in it. Dice the onion, pepper, and celery; all should be similar sizes. Mince the garlic. Finely chop the red bell pepper. In a large saute pan, heat about 3 tablespoons oil or butter. Add 3 tablespoons flour and stir constantly and vigorously as it cooks to a color just lighter than peanut butter. Add a couple tablespoons of stock and the onion, bell pepper, celery, and garlic and saute until the vegetables are soft. Add the rice and stir to coat, then add the white wine and stir until it is almost all absorbed. Begin adding the hot stock about a half cup at a time, stirring until it is almost absorbed each time. When done, the rice should have a bit of a bite without being chalky in the middle. About 7 minutes before you think it will be done, add in the red pepper and season with dried thyme, Tabasco, Tony's, and black pepper. Add the andouille and a squirt of lemon just at the end. Serve with lots of fresh parsley and a lemon wedge for squeezing.
*He loves "dense cakes," of which carrot cake is not an exemplar but which is nevertheless his favorite.
**If flour can be a verb, why can't cocoa?
Sunday, August 17, 2014
Don't be koi
A couple weeks ago, I went food shopping after a long, long day on call. Maybe it was the bone-crushing fatigue, but I had a maudlin moment with an enormous whole seabass sinuously displayed on ice. And now I'm strictly vegetarian again. Enter the fishless existence.
Luckily, the farmer's market is teeming with late-summer delights. Enter the tomato:


(That last photo is particularly terrible. New camera soon, I promise.) These went into a Mark Bittman recipe, with some adaptations of course. Cherry tomato cobbler is one of my new favorites.
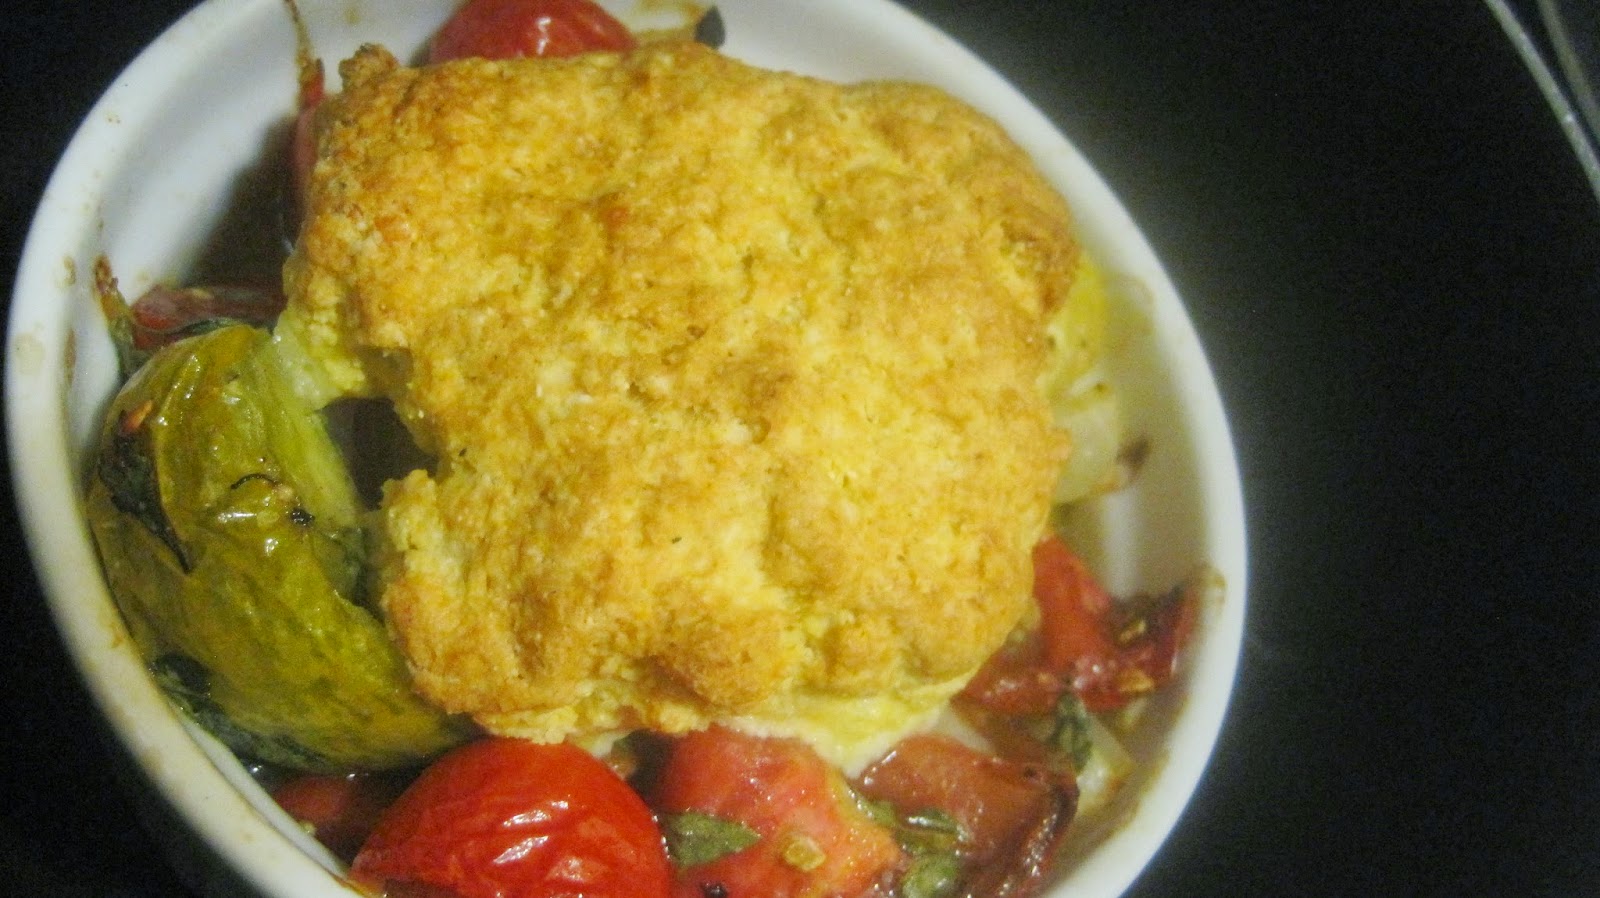
There was an awful lot of liquid left in the bottom of the ramekins, possibly because I accidentally baked it at too high a temperature (meaning that the biscuit finished cooking before the tomatoes could properly caramelize). I've reserved it for a tomato basil vinaigrette.
Cherry tomato cobbler
Based on a recipe by Mark Bittman. Serves 8. Feel free to halve it.
2 pints cherry tomatoes, preferably a mix of interesting cultivars like those at the farmer's market
1 small onion
2 cloves garlic
at least 1/4 cup basil (I used bush basil; more on this tomorrow!)
salt, freshly ground pepper
1/4 to 1/2 tsp sugar
2 tablespoons butter, very cold
1 egg, cold
1/2 cup cold buttermilk
3/4 c flour
3/4 c cornmeal
1/3 c Parmesan
3/4 t baking powder
3/4 t baking soda
Thinly slice garlic cloves and onion and chop the basil. Halve the cherry tomatoes. Toss in a bowl with salt, pepper, sugar, and a little olive oil. Set aside.
Mix together the dry ingredients (flour, cornmeal, powder, soda). In a food processor or with a pastry blender, mix with the Parmesan and butter until mixture resembles coarse crumbs. Add the egg and buttermilk and mix just until blended.
Fill a greased dish or several greased ramekins with tomato mixture. Lay slightly flattened scoops of biscuit dough on top. Bake in a 425-degree oven for 25 minutes, or until biscuit is browned and tomatoes are soft. Serve warm, sprinkled with more cheese and basil if you like.
Luckily, the farmer's market is teeming with late-summer delights. Enter the tomato:
(That last photo is particularly terrible. New camera soon, I promise.) These went into a Mark Bittman recipe, with some adaptations of course. Cherry tomato cobbler is one of my new favorites.
There was an awful lot of liquid left in the bottom of the ramekins, possibly because I accidentally baked it at too high a temperature (meaning that the biscuit finished cooking before the tomatoes could properly caramelize). I've reserved it for a tomato basil vinaigrette.
Cherry tomato cobbler
Based on a recipe by Mark Bittman. Serves 8. Feel free to halve it.
2 pints cherry tomatoes, preferably a mix of interesting cultivars like those at the farmer's market
1 small onion
2 cloves garlic
at least 1/4 cup basil (I used bush basil; more on this tomorrow!)
salt, freshly ground pepper
1/4 to 1/2 tsp sugar
2 tablespoons butter, very cold
1 egg, cold
1/2 cup cold buttermilk
3/4 c flour
3/4 c cornmeal
1/3 c Parmesan
3/4 t baking powder
3/4 t baking soda
Thinly slice garlic cloves and onion and chop the basil. Halve the cherry tomatoes. Toss in a bowl with salt, pepper, sugar, and a little olive oil. Set aside.
Mix together the dry ingredients (flour, cornmeal, powder, soda). In a food processor or with a pastry blender, mix with the Parmesan and butter until mixture resembles coarse crumbs. Add the egg and buttermilk and mix just until blended.
Fill a greased dish or several greased ramekins with tomato mixture. Lay slightly flattened scoops of biscuit dough on top. Bake in a 425-degree oven for 25 minutes, or until biscuit is browned and tomatoes are soft. Serve warm, sprinkled with more cheese and basil if you like.
Thursday, August 14, 2014
All scream
There were cactus pears at one of the fruit stands! Good thing, too, since I was already planning to make these (with the addition of black beans to the salsa and substitution of ricotta salata for the queso fresco, since according to Chris the Cheese Guy, Fairway is having a tiff with its Mexican warehouse and there won't be Mexican products for some time (???)). A creamy cactus pear ice cream felt like just the dessert to go with it.
No-churn ice cream can't beat the real thing; it has a slightly greasy post-prandial mouthfeel and goes from solid to oozy very quickly. That being said, it doesn't require extra equipment, and it is hard to mess up. It usually includes heavy cream plus coconut cream or condensed milk, so there's no egg custard base to curdle. Overbeating the whipping cream or overfolding the mixture are the only real potential barriers to fat-laden dairy goodness in the flavor of your choice.
Candied hot peppers
~1/2 lb hot peppers
1/3 cup vinegar
1 cup sugar, preferably turbinado
juice and zest of 1 lime
2 tablespoons tequila
Slice the peppers about 1/4 inch thick, either lengthwise or widthwise. Discard the spongy stuff in the middle, but don't get rid of those spicy seeds!
Mix the vinegar, sugar, zest, and juice in a small pot and bring to a rolling boil. Reduce the heat to low and carefully add the tequila (it will spit and sputter). Add the hot peppers and simmer until the liquid is reduced a and the peppers are soft, about 5 minutes. Strain over a bowl, reserving the syrup. Put the pepper slices in a clean glass jar; how many seeds you include is up to you and your hardy palate! Add syrup to cover and tightly cap the jar. Cool completely before refrigerating.
Cactus pear and jalapeno no-churn ice cream
2 cups whipping cream, very, very cold
10 oz condensed milk
3 cactus pears
1/3 cup finely chopped candied jalapenos, plus some of the jalapeno syrup
1 small vanilla bean, or 1 tsp extract
1/4 tsp sea salt
optional: 1/4 cup fresh mint, gently torn
Peel and cube the cactus pears, and toss with the candied jalapenos. Be careful; if the pears aren't pre-cleaned, you will have to use gloves and thoroughly rinse them under cold water to remove the tiny furry spines.
Mix the condensed milk, vanilla, sea salt, and (optionally) mint in a liddable container. Whip the cream in a stand mixer until it holds stiff peaks. Stir about a cup of the cream into the condensed milk mixture to lighten it. Add a few tablespoons of the jalapeno syrup, titrating to taste. Gently fold in the rest of the whipped cream without deflating it. Cover the container and freeze the mixture for an hour.
After an hour has passed, gently fold in the cactus pear/candied jalapeno mixture, relid the container, and replace in the freezer. Fold one more time after another 30 minutes to one hour. Freeze for an additional 5-6 hours, or until firm.
No-churn ice cream can't beat the real thing; it has a slightly greasy post-prandial mouthfeel and goes from solid to oozy very quickly. That being said, it doesn't require extra equipment, and it is hard to mess up. It usually includes heavy cream plus coconut cream or condensed milk, so there's no egg custard base to curdle. Overbeating the whipping cream or overfolding the mixture are the only real potential barriers to fat-laden dairy goodness in the flavor of your choice.
Candied hot peppers
~1/2 lb hot peppers
1/3 cup vinegar
1 cup sugar, preferably turbinado
juice and zest of 1 lime
2 tablespoons tequila
Slice the peppers about 1/4 inch thick, either lengthwise or widthwise. Discard the spongy stuff in the middle, but don't get rid of those spicy seeds!
Mix the vinegar, sugar, zest, and juice in a small pot and bring to a rolling boil. Reduce the heat to low and carefully add the tequila (it will spit and sputter). Add the hot peppers and simmer until the liquid is reduced a and the peppers are soft, about 5 minutes. Strain over a bowl, reserving the syrup. Put the pepper slices in a clean glass jar; how many seeds you include is up to you and your hardy palate! Add syrup to cover and tightly cap the jar. Cool completely before refrigerating.
Cactus pear and jalapeno no-churn ice cream
2 cups whipping cream, very, very cold
10 oz condensed milk
3 cactus pears
1/3 cup finely chopped candied jalapenos, plus some of the jalapeno syrup
1 small vanilla bean, or 1 tsp extract
1/4 tsp sea salt
optional: 1/4 cup fresh mint, gently torn
Peel and cube the cactus pears, and toss with the candied jalapenos. Be careful; if the pears aren't pre-cleaned, you will have to use gloves and thoroughly rinse them under cold water to remove the tiny furry spines.
Mix the condensed milk, vanilla, sea salt, and (optionally) mint in a liddable container. Whip the cream in a stand mixer until it holds stiff peaks. Stir about a cup of the cream into the condensed milk mixture to lighten it. Add a few tablespoons of the jalapeno syrup, titrating to taste. Gently fold in the rest of the whipped cream without deflating it. Cover the container and freeze the mixture for an hour.
After an hour has passed, gently fold in the cactus pear/candied jalapeno mixture, relid the container, and replace in the freezer. Fold one more time after another 30 minutes to one hour. Freeze for an additional 5-6 hours, or until firm.
Saturday, August 9, 2014
Deception
It's so easy to be fooled by how supposedly healthful foods are marketed. Protein bars, sports drinks, trail mix... their levels of fat, simple sugars, and calories belie the packaging. Granola is one of the worst offenders. Our local Fairway has bins of the stuff in any flavor you could imagine. If it's anything like the boxed stuff, it's terrible for you. Solution: make your own!
Using all-natural, freshly-ground peanut butter gives you the oil needed for a crispy granola, not to mention a delightful flavor, but without a lot of added sugar. On that note, nothing drives home the massive amounts of sugar used in commercial granolas and cereals like making your own with a half-cup of sweetener and getting only a very lightly sweet product. I tried a really artificial sugar-free pancake syrup I've had hanging around. It was...fine. Much better was the pop of chopped dried apple and ginger.
Peanut butter quinoa granola
1/2 cup peanut butter (the freshly ground kind, not the artificial kind)
2 tablespoons flaxseeds
1 cup raw quinoa
1/2 cup amaranth or millet
2 cups rolled oats
1/4 to 1/2 cup honey, agave syrup, or maple syrup
1 1/2 teaspoons vanilla extract, or the contents of 1/2 large vanilla bean
1/4 teaspoon almond extract
3/4 to 1 cup chopped dried ginger, apple, dates... whatever you like
2 tablespoons grated fresh ginger
nutmeg, cloves, cinnamon, or other spices to taste (try black pepper, too!)
1 teaspoon sea salt, plus more to taste
2 egg whites
optional: 1/2 cup coconut flakes (unsweetened, if you can find it)
optional: other nuts and seeds of your choice
optional: use hazelnut extract and add some bittersweet chocolate for a Nutella-esque flavor
Rinse the quinoa well to get rid of those nasty saponins. Heat an empty pot over medium heat with about 1/2 teaspoon olive or sesame oil. Add the quinoa and amaranth/millet. Stir frequently for about 10 minutes, or until the quinoa puffs up and smells toasty; you'll see the volume in the pot increase when this happens, but the grains won't turn transluscent or anything. Set aside to cool.
Preheat your oven to 250 degrees and line a large cookie sheet with parchment paper. In a big bowl, combine the coconut, sweetener, extracts, and peanut butter. Add the rest of the ingredients and mix very well. In a separate bowl, whisk the egg whites until frothy and mix into the granola until just combined. Spread the granola mix in a 1-inch layer on the prepared cookie sheet and pat down firmly to form one contiguous layer.
Bake for 30 minutes, then flip the granola (without breaking the sheet, if you can!) and bake for another hour or so, flipping about every 15 minutes. Allow to cool for 1 hour after baking, then break up and store in an airtight container to keep it crispy.
Using all-natural, freshly-ground peanut butter gives you the oil needed for a crispy granola, not to mention a delightful flavor, but without a lot of added sugar. On that note, nothing drives home the massive amounts of sugar used in commercial granolas and cereals like making your own with a half-cup of sweetener and getting only a very lightly sweet product. I tried a really artificial sugar-free pancake syrup I've had hanging around. It was...fine. Much better was the pop of chopped dried apple and ginger.
Peanut butter quinoa granola
1/2 cup peanut butter (the freshly ground kind, not the artificial kind)
2 tablespoons flaxseeds
1 cup raw quinoa
1/2 cup amaranth or millet
2 cups rolled oats
1/4 to 1/2 cup honey, agave syrup, or maple syrup
1 1/2 teaspoons vanilla extract, or the contents of 1/2 large vanilla bean
1/4 teaspoon almond extract
3/4 to 1 cup chopped dried ginger, apple, dates... whatever you like
2 tablespoons grated fresh ginger
nutmeg, cloves, cinnamon, or other spices to taste (try black pepper, too!)
1 teaspoon sea salt, plus more to taste
2 egg whites
optional: 1/2 cup coconut flakes (unsweetened, if you can find it)
optional: other nuts and seeds of your choice
optional: use hazelnut extract and add some bittersweet chocolate for a Nutella-esque flavor
Rinse the quinoa well to get rid of those nasty saponins. Heat an empty pot over medium heat with about 1/2 teaspoon olive or sesame oil. Add the quinoa and amaranth/millet. Stir frequently for about 10 minutes, or until the quinoa puffs up and smells toasty; you'll see the volume in the pot increase when this happens, but the grains won't turn transluscent or anything. Set aside to cool.
Preheat your oven to 250 degrees and line a large cookie sheet with parchment paper. In a big bowl, combine the coconut, sweetener, extracts, and peanut butter. Add the rest of the ingredients and mix very well. In a separate bowl, whisk the egg whites until frothy and mix into the granola until just combined. Spread the granola mix in a 1-inch layer on the prepared cookie sheet and pat down firmly to form one contiguous layer.
Bake for 30 minutes, then flip the granola (without breaking the sheet, if you can!) and bake for another hour or so, flipping about every 15 minutes. Allow to cool for 1 hour after baking, then break up and store in an airtight container to keep it crispy.
In brief
I'm taking serious advantage of my elective time. For instance, on Thursday I made two flavors of macarons: jasmine with a grapefruit filling, and "margarita" macarons consisting of lime shells with a spicy tequila buttercream.

The lime shells are kind of flat because I overbeat the second batch of batter. The flavor is spot-on, though!
Below are the recipes for each. Note that if you're using colored gels or powders, whip them together with the egg whites and sugar.
Jasmine macarons
contents of 2 jasmine teabags (usually a jasmine and green tea blend)
110 g almond meal (or ground blanched almonds)
200 g confectioner's sugar
90 g egg whites, left out at room temperature for at least 1 hour
30 g sugar
pinch salt
Pulse the almond meal, confectioner's sugar, and tea in a food processor or blender just until finely powdered. Set aside.
In a standing mixer with a whisk attachment, whip the egg whites, salt, and granulated sugar until stiff peaks form but the egg whites are not curdled or dry. Sift the almond mixture over the egg whites, discarding any bits that don't make it through the sifter. Working briskly with a rubber spatula, fold the two together just until a thick, ropy batter is formed. Using a pastry bag or icing plunger, pipe one-inch circles of batter onto cookie sheets lined with parchment paper. The circles should be 1.5 to 2 inches apart to allow good air circulation. Firmly rap the baking sheet on the counter 3 or 4 times to release any air bubbles in the macarons. Sprinkle a little more tea on top of the cookies. Let rest for about 30 minutes, or until a dry crust forms on top.
Bake in a 300-degree oven for 15 minutes. Check halfway through baking; if the macarons begin to brown, turn down the heat a bit. Cool the cookies completely on a rack before filling.
Grapefruit curd
1 tbsp plus 2 tsp grapefruit zest
120 mL (about 4 oz) fresh grapefruit juice
3 egg yolks
115 g sugar
3 tbsp butter
1/8 tsp sea salt
1/2 tbsp cornstarch
Whisk together the cornstarch, sugar, and salt in a small pot. Slowly whisk in the egg yolks, grapefruit juice, and 1 tbsp zest. Heat with the butter over medium-low, whisking constantly, until the mixture is thick. It should take about 10 minutes. Do not let it boil, or the egg yolks will curdle! Strain the mixture into a small container and fold in the reserved 2 tsp zest. Cover with plastic wrap, pressing over the surface of the hot curd to prevent skin formation. Cool to room temperature, then refrigerate.
Lime macarons
zest of 3 limes
110 g almond meal
200 g confectioner's sugar
90 g egg whites, left out at room temperature for at least 1 hour
30 g sugar
pinch salt
Zest the limes, reserving a bit if you'd like to sprinkle some atop the macarons. Pulse the almond meal, confectioner's sugar, and zest in a food processor or blender just until finely powdered. Set aside for at least 20 minutes to allow the lime flavor to permeate the mixture, since the zest will get sifted out.
In a standing mixer with a whisk attachment, whip the egg whites, salt, and granulated sugar until stiff peaks form but the egg whites are not curdled or dry. Sift the almond mixture over the egg whites, discarding any bits that don't make it through the sifter (including the zest). Working briskly with a rubber spatula, fold the two together just until a thick, ropy batter is formed. Using a pastry bag or icing plunger, pipe one-inch circles of batter onto cookie sheets lined with parchment paper. The circles should be 1.5 to 2 inches apart to allow good air circulation. Firmly rap the baking sheet on the counter 3 or 4 times to release any air bubbles in the macarons. Sprinkle some crushed sea salt and, optionally, zest on top; this really needs the hit of salt to work, so don't omit that! Let rest for about 30 minutes, or until a dry crust forms on top.
Bake in a 300-degree oven for 15 minutes. Check halfway through baking; if the macarons begin to brown, turn down the heat a bit. Cool the cookies completely on a rack before filling.
Jalapeno tequila buttercream
1 stick butter
3 egg yolks
1/3 cup sugar
3 tablespoons tequila
pinch salt
2 small jalapenos (deseed if you want, or deseed and add some cayenne later to titrate the heat more precisely), finely minced
optional: 1/4 tsp cayenne
optional: food coloring of some sort
Cut the butter into chunks. You will want it room temperature, but not totally soft, when it's time to assemble the buttercream; let it sit out accordingly.
Whip the egg yolks and salt in a stand mixer until thick and pale. In a small saucepan, mix the sugar, tequila, and jalapeno. Boil until it reaches the soft ball stage, then remove from heat. With the stand mixer on a low setting, slowly and gently pour the hot syrup down the inside of the bowl. When all the syrup is in, turn the stand mixer to high and beat until the mixture reaches room temperature. At that point, start adding your butter about 1 tablespoon at a time, mixing well between each addition. When the butter is completely incorporated, whip on medium-high speed until the buttercream is thick and silky.
Protip: if it breaks/curdles, microwave a small amount until it's melted, but not hot or boiled. Whip this into the remainder of the buttercream at high speed to reconstitute the frosting.
The lime shells are kind of flat because I overbeat the second batch of batter. The flavor is spot-on, though!
Below are the recipes for each. Note that if you're using colored gels or powders, whip them together with the egg whites and sugar.
Jasmine macarons
contents of 2 jasmine teabags (usually a jasmine and green tea blend)
110 g almond meal (or ground blanched almonds)
200 g confectioner's sugar
90 g egg whites, left out at room temperature for at least 1 hour
30 g sugar
pinch salt
Pulse the almond meal, confectioner's sugar, and tea in a food processor or blender just until finely powdered. Set aside.
In a standing mixer with a whisk attachment, whip the egg whites, salt, and granulated sugar until stiff peaks form but the egg whites are not curdled or dry. Sift the almond mixture over the egg whites, discarding any bits that don't make it through the sifter. Working briskly with a rubber spatula, fold the two together just until a thick, ropy batter is formed. Using a pastry bag or icing plunger, pipe one-inch circles of batter onto cookie sheets lined with parchment paper. The circles should be 1.5 to 2 inches apart to allow good air circulation. Firmly rap the baking sheet on the counter 3 or 4 times to release any air bubbles in the macarons. Sprinkle a little more tea on top of the cookies. Let rest for about 30 minutes, or until a dry crust forms on top.
Bake in a 300-degree oven for 15 minutes. Check halfway through baking; if the macarons begin to brown, turn down the heat a bit. Cool the cookies completely on a rack before filling.
Grapefruit curd
1 tbsp plus 2 tsp grapefruit zest
120 mL (about 4 oz) fresh grapefruit juice
3 egg yolks
115 g sugar
3 tbsp butter
1/8 tsp sea salt
1/2 tbsp cornstarch
Whisk together the cornstarch, sugar, and salt in a small pot. Slowly whisk in the egg yolks, grapefruit juice, and 1 tbsp zest. Heat with the butter over medium-low, whisking constantly, until the mixture is thick. It should take about 10 minutes. Do not let it boil, or the egg yolks will curdle! Strain the mixture into a small container and fold in the reserved 2 tsp zest. Cover with plastic wrap, pressing over the surface of the hot curd to prevent skin formation. Cool to room temperature, then refrigerate.
Lime macarons
zest of 3 limes
110 g almond meal
200 g confectioner's sugar
90 g egg whites, left out at room temperature for at least 1 hour
30 g sugar
pinch salt
Zest the limes, reserving a bit if you'd like to sprinkle some atop the macarons. Pulse the almond meal, confectioner's sugar, and zest in a food processor or blender just until finely powdered. Set aside for at least 20 minutes to allow the lime flavor to permeate the mixture, since the zest will get sifted out.
In a standing mixer with a whisk attachment, whip the egg whites, salt, and granulated sugar until stiff peaks form but the egg whites are not curdled or dry. Sift the almond mixture over the egg whites, discarding any bits that don't make it through the sifter (including the zest). Working briskly with a rubber spatula, fold the two together just until a thick, ropy batter is formed. Using a pastry bag or icing plunger, pipe one-inch circles of batter onto cookie sheets lined with parchment paper. The circles should be 1.5 to 2 inches apart to allow good air circulation. Firmly rap the baking sheet on the counter 3 or 4 times to release any air bubbles in the macarons. Sprinkle some crushed sea salt and, optionally, zest on top; this really needs the hit of salt to work, so don't omit that! Let rest for about 30 minutes, or until a dry crust forms on top.
Bake in a 300-degree oven for 15 minutes. Check halfway through baking; if the macarons begin to brown, turn down the heat a bit. Cool the cookies completely on a rack before filling.
Jalapeno tequila buttercream
1 stick butter
3 egg yolks
1/3 cup sugar
3 tablespoons tequila
pinch salt
2 small jalapenos (deseed if you want, or deseed and add some cayenne later to titrate the heat more precisely), finely minced
optional: 1/4 tsp cayenne
optional: food coloring of some sort
Cut the butter into chunks. You will want it room temperature, but not totally soft, when it's time to assemble the buttercream; let it sit out accordingly.
Whip the egg yolks and salt in a stand mixer until thick and pale. In a small saucepan, mix the sugar, tequila, and jalapeno. Boil until it reaches the soft ball stage, then remove from heat. With the stand mixer on a low setting, slowly and gently pour the hot syrup down the inside of the bowl. When all the syrup is in, turn the stand mixer to high and beat until the mixture reaches room temperature. At that point, start adding your butter about 1 tablespoon at a time, mixing well between each addition. When the butter is completely incorporated, whip on medium-high speed until the buttercream is thick and silky.
Protip: if it breaks/curdles, microwave a small amount until it's melted, but not hot or boiled. Whip this into the remainder of the buttercream at high speed to reconstitute the frosting.
Monday, June 30, 2014
Final countdown
T minus eighteen hours until my first day as a doctor--specifically, as an intern, the juniormost workhorse of all hospital workhorses. I've got a few goals for this year, other than that whole "do no harm" bit. The most serious is to improve the sense of clinical intuition that all great attendings seem to have in spades. I remember the first time I (accurately) had that sensation, and how rewarding it was: a very intelligent, well-spoken, healthy and spry elderly gentleman in the ER with a couple days of "gastroenteritis" who, despite his protestations that he just felt dehydrated from all the vomiting, didn't look quite right to me. I'll spare you the HIPAA violation, but in short, he ended up being admitted to the medicine floor and quickly escalated to the ICU for something much more significant and unusual than gastroenteritis. It was incredibly gratifying to be rewarded for pursuing more thorough investigations than the chief complaint warranted on the basis of a few physical exam findings and an odd sense of disquiet.
My least serious goal: stay physically fit. The long, meandering walks I've been taking can't continue--at least not at their current frequency--but I'm determined to resist the pull of takeout and free conference food and cafeteria snacks. To help myself along both physically and financially, I've come up with a recipe for protein bars that are neither disgusting nor candy bars in disguise.

I'm sure I'm not the only one who has gone through the drugstore/grocery store/Bellevue gift shop ritual of painstakingly reading the nutrition facts of each brand of protein bar on offer, calculating protein:calorie, protein:sugar, and protein:dollar ratios. Most of them are... well, let's just say unsatisfactory, and some of the ones that aren't taste like chalk. The Bellevue gift shop has some good options, including MetRx and Protein Plus, (my personal favorite both for the taste and the absolutely fantastic ratios). But even buying Protein Plus bars in bulk, which we did to bring to Iceland, gets a little pricey. The date bars I've used in the past for on-the-wards snacking are more expensive, more messy, more time-consuming, and more carbohydratey than these puppies... I'm a convert.
WolframAlpha has a nifty function that, given ingredient inputs, will output a thorough nutrition profile of the total. These have, minus the optional chopped nuts and dried fruit but including the optional oats, about 206 calories, 20 g protein, 14 g carbs, and 10 g fat per serving. Of course, most of the 6 g of sugar comes from the chocolate chips, and most of the fat from the nut butter; if you wanted to be really crazy, you could reduce or omit those ingredients, but of course, those are the tastiest elements!
Extra-chocolatey protein bars
30 g (1/4 to 1/3 c) raw almonds
optional: 20 g (1/4 c) oats
30 g (1/4 c) cocoa powder
1/4 c semi- or bittersweet chocolate chips (can up to 1/3 if you like a sweeter bar)
3 tablespoons nut butter (preferably not the processed, sweetened type)
3/4 c vanilla protein powder
1/2 c chocolate protein powder
nondairy milk
optional: assorted chopped nuts and dried fruit
In a food processor or blender, grind the almonds and oats, if using, until they are mostly the texture of coarse sand; you don't want it to be completely ground just yet. Add in the cocoa and chocolate chips and pulse until blended together. Dump into a bowl and add the protein powders and nut butter. Slowly add the nondairy milk, blending with a spatula, until the mixture becomes a thick, somewhat tacky dough. Line a square pan with parchment paper, with enough overhang to completely cover the pan when folded over. Sprinkle the chopped fruit/nuts on evenly, if using. Pat in the dough and fold the parchment over it. With your hands, pat and spread the dough until it completely fills the pan and covers the chopped fruit/nut layer. Freeze or refrigerate until firm, then cut into 8 pieces; I like to keep mine frozen so they stay cold until I'm ready to eat them at work.
My least serious goal: stay physically fit. The long, meandering walks I've been taking can't continue--at least not at their current frequency--but I'm determined to resist the pull of takeout and free conference food and cafeteria snacks. To help myself along both physically and financially, I've come up with a recipe for protein bars that are neither disgusting nor candy bars in disguise.
I'm sure I'm not the only one who has gone through the drugstore/grocery store/Bellevue gift shop ritual of painstakingly reading the nutrition facts of each brand of protein bar on offer, calculating protein:calorie, protein:sugar, and protein:dollar ratios. Most of them are... well, let's just say unsatisfactory, and some of the ones that aren't taste like chalk. The Bellevue gift shop has some good options, including MetRx and Protein Plus, (my personal favorite both for the taste and the absolutely fantastic ratios). But even buying Protein Plus bars in bulk, which we did to bring to Iceland, gets a little pricey. The date bars I've used in the past for on-the-wards snacking are more expensive, more messy, more time-consuming, and more carbohydratey than these puppies... I'm a convert.
WolframAlpha has a nifty function that, given ingredient inputs, will output a thorough nutrition profile of the total. These have, minus the optional chopped nuts and dried fruit but including the optional oats, about 206 calories, 20 g protein, 14 g carbs, and 10 g fat per serving. Of course, most of the 6 g of sugar comes from the chocolate chips, and most of the fat from the nut butter; if you wanted to be really crazy, you could reduce or omit those ingredients, but of course, those are the tastiest elements!
Extra-chocolatey protein bars
30 g (1/4 to 1/3 c) raw almonds
optional: 20 g (1/4 c) oats
30 g (1/4 c) cocoa powder
1/4 c semi- or bittersweet chocolate chips (can up to 1/3 if you like a sweeter bar)
3 tablespoons nut butter (preferably not the processed, sweetened type)
3/4 c vanilla protein powder
1/2 c chocolate protein powder
nondairy milk
optional: assorted chopped nuts and dried fruit
In a food processor or blender, grind the almonds and oats, if using, until they are mostly the texture of coarse sand; you don't want it to be completely ground just yet. Add in the cocoa and chocolate chips and pulse until blended together. Dump into a bowl and add the protein powders and nut butter. Slowly add the nondairy milk, blending with a spatula, until the mixture becomes a thick, somewhat tacky dough. Line a square pan with parchment paper, with enough overhang to completely cover the pan when folded over. Sprinkle the chopped fruit/nuts on evenly, if using. Pat in the dough and fold the parchment over it. With your hands, pat and spread the dough until it completely fills the pan and covers the chopped fruit/nut layer. Freeze or refrigerate until firm, then cut into 8 pieces; I like to keep mine frozen so they stay cold until I'm ready to eat them at work.
Wednesday, June 25, 2014
Leftovers
Way to forget to post this for several days, Hannah.
It's generally easy to avoid owning single-purpose kitchen items when your kitchen is the size of most people's closets. You just have to think, "Will I be able to fit my hand in the drawer if I purchase this? No? Am I willing to throw something away in order to own it? No? Back on the shelf." (Exceptions: I do own a mandoline, to make up for my amateur knife skills, and a KitchenAid pasta attachment, because fresh pasta needs no excuses.)
Much more difficult is avoiding single-purpose ingredients. You know what I mean: those extracts and vinegars and cheeses that one and only one recipe requires. Plenty of times I'll concoct a substitute or just move on to the next recipe--I'm looking at you, black vinegar--but sometimes I just have to have it. Thus the head of black garlic that's been languishing in my fridge for months. Thus my habit of allowing a couple stray ounces of goat cheese to go crusty, because who can finish a log of goat cheese that fast, anyway?
But no more! Time to use up a lot of black garlic!
This is black garlic cod with mushroom agnolotti, frizzled kale, and a celeriac and parsley puree.


Have a quick agnolotti tutorial:
I also did a black garlic chocolate budino with raspberry red wine coulis and a crunchy hazelnut biscuit (which was supposed to be a tuile, but I decided to try a new recipe that did not tuile at all). It was pretty transcendental... so transcendental that we gobbled it down before taking pictures. Ditto the pad see ew made two days ago, and the blueberry pie with the best filling I've ever done (red wine, leftover raspberry coulis, and allspice in the filling, as well as a bit of ground tapioca for texture; the tapioca or tapioca flour can be found in the bulk section of your local food coop or, likely, Whole Foods).
And I also made goat cheese gnocchi to use up the aforementioned goat cheese. No pictures; just recipe.
Goat cheese gnocchi
It's generally easy to avoid owning single-purpose kitchen items when your kitchen is the size of most people's closets. You just have to think, "Will I be able to fit my hand in the drawer if I purchase this? No? Am I willing to throw something away in order to own it? No? Back on the shelf." (Exceptions: I do own a mandoline, to make up for my amateur knife skills, and a KitchenAid pasta attachment, because fresh pasta needs no excuses.)
Much more difficult is avoiding single-purpose ingredients. You know what I mean: those extracts and vinegars and cheeses that one and only one recipe requires. Plenty of times I'll concoct a substitute or just move on to the next recipe--I'm looking at you, black vinegar--but sometimes I just have to have it. Thus the head of black garlic that's been languishing in my fridge for months. Thus my habit of allowing a couple stray ounces of goat cheese to go crusty, because who can finish a log of goat cheese that fast, anyway?
But no more! Time to use up a lot of black garlic!
This is black garlic cod with mushroom agnolotti, frizzled kale, and a celeriac and parsley puree.
Have a quick agnolotti tutorial:
 |
| Agnolotti can be folded-over squares or circles; I went for squares, not in the least because it gave me an excuse to buy a square cutter (for a dollar!) that will really help with biscuits. The dough is an egg-enriched pasta rolled out to the second- thickest setting on my KitchenAid. |
 |
| Place a quarter-teaspoon of filling slightly off-center toward one of the points. Trust me when I say that's enough filling. |
 |
| And fold over, pressing around the daub of filling to get out all the air. Seal with a little water if necessary. |
I also did a black garlic chocolate budino with raspberry red wine coulis and a crunchy hazelnut biscuit (which was supposed to be a tuile, but I decided to try a new recipe that did not tuile at all). It was pretty transcendental... so transcendental that we gobbled it down before taking pictures. Ditto the pad see ew made two days ago, and the blueberry pie with the best filling I've ever done (red wine, leftover raspberry coulis, and allspice in the filling, as well as a bit of ground tapioca for texture; the tapioca or tapioca flour can be found in the bulk section of your local food coop or, likely, Whole Foods).
And I also made goat cheese gnocchi to use up the aforementioned goat cheese. No pictures; just recipe.
Goat cheese gnocchi
7 oz goat cheese, slightly cooler than room temp
3 egg yolks
125-150 g flour (1 cup ish, if you don't have a scale)
salt and pepper
Cream the goat cheese and egg yolks until thoroughly combined. Gradually add the flour until the dough is tacky but able to be handled; salt and pepper to taste. Do not overwork, or the gnocchi will be dense and tough. Chill for at least 30 minutes, 1 hour preferred.
There are a few techniques for creating the dumplings: rolling little snakes of dough and cutting off snippets, squirting them out of a pastry bag, or rolling them gently between your floured palms. I prefer the third option; I am unable to get fluffy gnocchi with the first technique for some reason, and I hate cleaning pastry bags. Do whichever you prefer. Roll the finished dumplings over a fork to get the classic ridged appearance.
Bring a pot of salted water to a rolling boil. Boil the gnocchi until they float, at which point they should be cooked through but tender to the tooth. Optionally, sear in a buttered pan before serving.
3 egg yolks
125-150 g flour (1 cup ish, if you don't have a scale)
salt and pepper
Cream the goat cheese and egg yolks until thoroughly combined. Gradually add the flour until the dough is tacky but able to be handled; salt and pepper to taste. Do not overwork, or the gnocchi will be dense and tough. Chill for at least 30 minutes, 1 hour preferred.
There are a few techniques for creating the dumplings: rolling little snakes of dough and cutting off snippets, squirting them out of a pastry bag, or rolling them gently between your floured palms. I prefer the third option; I am unable to get fluffy gnocchi with the first technique for some reason, and I hate cleaning pastry bags. Do whichever you prefer. Roll the finished dumplings over a fork to get the classic ridged appearance.
Bring a pot of salted water to a rolling boil. Boil the gnocchi until they float, at which point they should be cooked through but tender to the tooth. Optionally, sear in a buttered pan before serving.
Saturday, June 21, 2014
Great finds
There was callaloo at the Dag Hammarskjold Plaza Greenmarket!

Callaloo can actually refer to several plants; this is amaranth (which can also be called Caribbean spinach, water spinach, or Jamaican spinach). I've eaten it before, but never had a chance to cook with it. The way callaloo is prepared varies by country, of course, but it's frequently combined with okra, "creamed" with coconut milk, or simply steamed. In this case, I cooked it with tomatoes, onions, carrot, and a lot of garlic... and photographed it with a wobbly camera with a pen stuck in the missing battery cover slot. Sigh. So much for photo quality.
I chose to put it with a whole roasted jerk porgy (cheapest fish at the market, even if I did have to scale and gut it myself*), and searched the Internet until I found a relatively simple, clean jerk sauce recipe. It was really good... once I'd added coriander and muscovado, reduced the salt level, and cut back on the thyme a little bit. Unfortunately, I wrote down the alterations but closed the link--which was open in incognito mode for some reason--and can't find it again. Recipe comes with caveats; I hope I remembered it correctly!
A tropical meal needs a tropical dessert: mojito cupcakes. I can't stand rum, but there's something about a touch of rum (well, rum extract) in a cupcake...
Whole roasted jerk fish
1 2-lb fish, snapper if you want to pay for it
bay leaves
onion slices
lime slices
jerk sauce (see below)
Clean your fish well and pat the skin completely dry. Salt both sides lightly and let sit for 10-15 minutes, then wipe dry again. Stuff the fish with lime slices, onion slices, and 3-5 bay leaves. Make a series of shallow diagonal cuts in this pattern on either side of the fish. Coat thoroughly with jerk sauce on both sides and marinate for 30 minutes or so, flipping and re-coating once with sauce. Preheat the oven to 425. Roast the fish about 15 minutes, depending on the thickness, until just slightly underdone. At that point, turn the oven to broil in order to crisp the skin and finish cooking. Serve with a slice of lime.
Jerk sauce (I think)
1 small onion, chopped
3 scallions, chopped
1 tsp coriander
1 to 1 1/2 tsp nutmeg
1 1/2 to 2 tsp dried thyme
1 1/2 tbsp ground allspice
1 tbsp ground ginger
1 tbsp black pepper
1/2 tbsp muscovado or brown sugar
1 tbsp salt
1/2 habanero (or a little less than that of Scotch bonnet)
1/4 c white vinegar (might have been 1/2??)
2 tbsp soy sauce (might have been 1/4 c??)
Blend it all in a blender or food processor. Adjust salt level.
Callaloo and okra
3 cups okra, fresh or frozen/defrosted, sliced into 1-inch chunks
1 large bunch callaloo (mine was somewhat massive...)
1 small onion
2 tomatoes, chopped
5 cloves garlic (yes, 5), thinly sliced
1 carrot, finely chopped
oil or butter
Melt the oil/butter in a large saucepan. Saute the onions until translucent. Add garlic, carrot, and salt until onions are soft and garlic is fragrant. Add chopped tomatoes and okra; cook until juices release and tomatoes begin to break down. Add the callaloo and cook, stirring, until greens are tender. Salt and pepper to taste.
Mojito cupcakes
1/2 c butter, room temperature
2/3 c granuated sugar
1/3 c dark brown sugar
2 eggs
zest and juice of 2 large limes
fresh mint, finely minced
1/4 tsp rum extract (may increase to taste)
1/4 tsp vanilla extract
1 1/2 c all-purpose flour
1 1/4 tsp baking powder
1/2 tsp baking soda
1/4 tsp salt
1/4 c sour cream or yogurt
1/3 c milk
Mix dry ingredients together in a medium-sized bowl. Whisk yogurt/sour cream and milk in a separate container. In a large bowl, cream butter and sugars until fluffy. Add eggs, 1 at a time, followed by lime juice/zest, mint, and extracts. Alternate adding flour mixture and milk mixture, beginning and ending with flour mixture, blending just until combined. Fill lined cupcake tins a little over halfway each. Bake at 325 F for 18-22 minutes or until cupcakes spring back when lightly pressed. Cool completely before assembly.
To assemble, pipe or spread on the frosting and roll in or sprinkle the minty sugar rocks. Finish with a little grind of sea salt on top.
Minty sugar rocks
1 c sugar
1/3 c water
1/2 tbsp honey
1 c fresh mint
green food coloring (optional)
pinch salt
Put all ingredients in a small sauce pan and bring to a boil, whisking just until sugar is fully dissolved. Cook to the hard-crack stage (300-310 F), swirling occasionally. Immediately pour through a metal strainer onto a baking sheet lined with parchment paper, tipping the pan to spread sugar in an even 1/4-inch thick layer (although it doesn't really matter all that much, since you'll be grinding it anyway). Cool completely. Break up with a mortar and pestle or by hand.
Alternatively, see this link for making rock candy if you want a truly lovely topping and have a little foresight.
Mint lime frosting
1 stick butter, room temperature
1-2 tbsp heavy cream
zest and juice of 1 lime
3-4 tbsp finely chopped fresh mint
powdered sugar
1 pinch salt
optional: rum or rum extract
Cream together the butter, 1/4 c powdered sugar, heavy cream, lime juice zest, salt, and optional rum/rum extract. Continue to add powdered sugar to taste or texture. Keep chilled until ready to frost cupcakes.
*It's been awhile since I've cleaned a fresh fish, and I've never done so inside an edifice that I cared about keeping clean, much less a teeny-weeny New York kitchen. Scales. Scales everywhere.
Callaloo can actually refer to several plants; this is amaranth (which can also be called Caribbean spinach, water spinach, or Jamaican spinach). I've eaten it before, but never had a chance to cook with it. The way callaloo is prepared varies by country, of course, but it's frequently combined with okra, "creamed" with coconut milk, or simply steamed. In this case, I cooked it with tomatoes, onions, carrot, and a lot of garlic... and photographed it with a wobbly camera with a pen stuck in the missing battery cover slot. Sigh. So much for photo quality.
 |
| Sorry for potato quality. |
 |
| Ditto with the apology. |
A tropical meal needs a tropical dessert: mojito cupcakes. I can't stand rum, but there's something about a touch of rum (well, rum extract) in a cupcake...
 |
| Andy's camera did a little better... |
Whole roasted jerk fish
1 2-lb fish, snapper if you want to pay for it
bay leaves
onion slices
lime slices
jerk sauce (see below)
Clean your fish well and pat the skin completely dry. Salt both sides lightly and let sit for 10-15 minutes, then wipe dry again. Stuff the fish with lime slices, onion slices, and 3-5 bay leaves. Make a series of shallow diagonal cuts in this pattern on either side of the fish. Coat thoroughly with jerk sauce on both sides and marinate for 30 minutes or so, flipping and re-coating once with sauce. Preheat the oven to 425. Roast the fish about 15 minutes, depending on the thickness, until just slightly underdone. At that point, turn the oven to broil in order to crisp the skin and finish cooking. Serve with a slice of lime.
Jerk sauce (I think)
1 small onion, chopped
3 scallions, chopped
1 tsp coriander
1 to 1 1/2 tsp nutmeg
1 1/2 to 2 tsp dried thyme
1 1/2 tbsp ground allspice
1 tbsp ground ginger
1 tbsp black pepper
1/2 tbsp muscovado or brown sugar
1 tbsp salt
1/2 habanero (or a little less than that of Scotch bonnet)
1/4 c white vinegar (might have been 1/2??)
2 tbsp soy sauce (might have been 1/4 c??)
Blend it all in a blender or food processor. Adjust salt level.
Callaloo and okra
3 cups okra, fresh or frozen/defrosted, sliced into 1-inch chunks
1 large bunch callaloo (mine was somewhat massive...)
1 small onion
2 tomatoes, chopped
5 cloves garlic (yes, 5), thinly sliced
1 carrot, finely chopped
oil or butter
Melt the oil/butter in a large saucepan. Saute the onions until translucent. Add garlic, carrot, and salt until onions are soft and garlic is fragrant. Add chopped tomatoes and okra; cook until juices release and tomatoes begin to break down. Add the callaloo and cook, stirring, until greens are tender. Salt and pepper to taste.
Mojito cupcakes
1/2 c butter, room temperature
2/3 c granuated sugar
1/3 c dark brown sugar
2 eggs
zest and juice of 2 large limes
fresh mint, finely minced
1/4 tsp rum extract (may increase to taste)
1/4 tsp vanilla extract
1 1/2 c all-purpose flour
1 1/4 tsp baking powder
1/2 tsp baking soda
1/4 tsp salt
1/4 c sour cream or yogurt
1/3 c milk
Mix dry ingredients together in a medium-sized bowl. Whisk yogurt/sour cream and milk in a separate container. In a large bowl, cream butter and sugars until fluffy. Add eggs, 1 at a time, followed by lime juice/zest, mint, and extracts. Alternate adding flour mixture and milk mixture, beginning and ending with flour mixture, blending just until combined. Fill lined cupcake tins a little over halfway each. Bake at 325 F for 18-22 minutes or until cupcakes spring back when lightly pressed. Cool completely before assembly.
To assemble, pipe or spread on the frosting and roll in or sprinkle the minty sugar rocks. Finish with a little grind of sea salt on top.
Minty sugar rocks
1 c sugar
1/3 c water
1/2 tbsp honey
1 c fresh mint
green food coloring (optional)
pinch salt
Put all ingredients in a small sauce pan and bring to a boil, whisking just until sugar is fully dissolved. Cook to the hard-crack stage (300-310 F), swirling occasionally. Immediately pour through a metal strainer onto a baking sheet lined with parchment paper, tipping the pan to spread sugar in an even 1/4-inch thick layer (although it doesn't really matter all that much, since you'll be grinding it anyway). Cool completely. Break up with a mortar and pestle or by hand.
Alternatively, see this link for making rock candy if you want a truly lovely topping and have a little foresight.
Mint lime frosting
1 stick butter, room temperature
1-2 tbsp heavy cream
zest and juice of 1 lime
3-4 tbsp finely chopped fresh mint
powdered sugar
1 pinch salt
optional: rum or rum extract
Cream together the butter, 1/4 c powdered sugar, heavy cream, lime juice zest, salt, and optional rum/rum extract. Continue to add powdered sugar to taste or texture. Keep chilled until ready to frost cupcakes.
*It's been awhile since I've cleaned a fresh fish, and I've never done so inside an edifice that I cared about keeping clean, much less a teeny-weeny New York kitchen. Scales. Scales everywhere.
Thursday, June 19, 2014
Deuteronomy 14:21
Riding home on the Megabus from Pittsburgh this past Sunday, I overheard a girl ask her new bus acquaintance what the difference between whiskey and bourbon is. He replied, with shocking confidence, that bourbon is aged in oak barrels, and whiskey is not. That's as false as he was sure about it. Whiskey can be aged in oak barrels. Bourbon, by law, must be aged in new charred oak barrels, made from at least 51 percent corn, and produced in the United States. There are some other differences involving what proof the alcohol must be and what can be added to it and so on. But it's the high percentage of corn, as opposed to a mash of other grains, that gives bourbon its distinctive sweetness.
Strictly speaking, corn is harvested in the early fall or late summer; fresh corn isn't at its peak yet in terms of sheer corniness (heh) and sweetness. The farmers market doesn't have it this early, of course, so I picked up a few ears from Fairway. Instead of cooking a kid in its mother's milk, I decided to cook corn in its progeny's milk, so to speak, to enhance the corn flavor and inject the sweetness that the corn lacks this early in the season.
My initial concept of the dish was confused. I couldn't decide if the flavors should be Southern, Turkish, Mexican. I bought and prepped a few more ingredients than I used, and used a couple things I shouldn't have. The recipe below is the ideal version, not the one actually marinating in my gastric juices*. A few points:
1. It's important not to overbrown the butter. Most pastry recipes that require browned butter direct you to cook it to "nut brown" or "deep brown," but since you'll be cooking a number of things in this, you don't want to risk burning the solids.
2. I know, I know, mint and paprika sounds like an odd combination. It's used frequently in Turkish and Syrian food, and it's fantastic. Open mind, please.
3. The one ingredient I wasn't sure whether to omit or not was kale. I chiffonaded about a cup of it and cooked the stems in the brown butter, then just stirred the kale in at the end. It made up for some of the earthy herbal flavors that, again, early corn kind of lacks, but on the other hand, maybe it just muddled the rest of the flavors. It's omitted in the recipe below.
Bourbon brown butter corn salad
4 ears corn
1.5 tablespoons butter
a little under 1 oz bourbon (I used half a nip of Jack Daniels, but didn't have anything volumetrically small enough to give it to you in mLs)
2 shallots, or 1 very small red onion
1/3 c chopped fresh mint
1/2 c toasted walnut halves
lime juice to taste
paprika, cayenne, salt, and pepper to taste
Brown the butter in a deep pan as directed above. Add the bourbon all at once and whisk vigorously until it stops sizzling. Fry the shallots/onion in this mixture until they're just short of burnt or, alternately, broil them until they're crispy and charred on top. Add the corn and stir to coat with the bourbon-butter sauce. Continue stirring over medium-high heat until it's just cooked. Remove from heat and add the mint, paprika, cayenne, salt, and pepper. Serve warm, adding lime juice and toasted walnuts just before serving.
*It has been pointed out to me that perhaps not everyone wants to think about the aftermath of eating in those terms...
Wednesday, June 18, 2014
Social media
I've been struggling with whether or not to continue this blog now that my stomach is actually MD*. There's plenty of identifying data on here, but on the other hand, nothing particularly offensive (I think... e-mail me if you disagree, of course!). Informal consultation with a few residents and one attending has convinced me that it's probably okay. A recent (er, not so recent now, I guess) position paper on the benefits and pitfalls of online activity for physicians is actually reassuring; I don't complain about patients, period, and don't plan to post anything particularly personal or embarrassing.
Unless you consider crostini of minted goat cheese spread and balsamic macerated cherries to be embarrassing.

I love macerated fruit (all fruit, in any form, to be fair). In particular, it's a great way to alter summer fruit in some way without taking away from the firm plumpness of it all like baking or stewing!

Protip: to easily halve and pit cherries, run a sharp paring knife all the way around the cherry lengthwise, then twist the two halves apart. They'll separate cleanly. Use your knife or fingers to flick the pit out of the half in which it's seated, and presto! Pitted halved cherry.

The bread is a simple country blonde from Flour Water Salt Yeast. Our super super, Peter, gave us a free window AC unit that one of his super friends didn't need, which will go a long way in increasing the frequency with which I bake, roast, and broil this summer. The bread was baked at 475, and broiled at an even higher temperature. Without the AC on, the apartment was nearly intolerable.
And now, have a bonus recipe for really good cookies.
Sesame-apricot cookies with the Momofuku technique
1 cup butter, room temperature
3/4 c white sugar
3/4 c packed brown sugar (I prefer light)
2 eggs
3/4 tsp vanilla extract (if you're not using almond, use a full tsp)
1/4 tsp almond extract
2 c flour
a scant 1 1/2 tsp salt
2 tsp baking powder
1 tsp baking soda
1/4 tsp cinnamon (can up to 1/2 for a more prominent flavor!)
1 c oats, not instant
Total of 2 c chopped dried apricots, white sesame seeds, and black sesame seeds, in your preferred ratios
Cream the butter and sugars in a stand mixer, if you have one. Add the eggs and vanilla and mix just until combined, scraping down the sides. Turn the stand mixer to medium-high speed (setting 4 on my KitchenAid) for a full 10 minutes, stopping halfway through to scrape down the sides. Add the flour, baking powder, baking soda, cinnamon, and salt, mixing just until combined, scraping down the sides. Finally, gently fold in the nuts/chocolate/fruit. Cover and chill the dough for at least 1.5 hours.
Preheat your oven to 375 F (original recipe on which I based this suggests 400, but I found that a bit too hot). Scoop out 1.5-tbsp scoops of dough onto a large cookie sheet, leaving at least 2 inches of space around each scoop. Grind a little kosher salt over the top. Bake 8-11 minutes. Note that the browning will start at the edges and rapidly move into the center; these cookies go from underdone to overdone in literally under a minute! Cool completely on the cookie sheet before serving.
*WOOOOOOOOO**
**Except I've yet to actually practice, sooo...
Unless you consider crostini of minted goat cheese spread and balsamic macerated cherries to be embarrassing.
I love macerated fruit (all fruit, in any form, to be fair). In particular, it's a great way to alter summer fruit in some way without taking away from the firm plumpness of it all like baking or stewing!
Protip: to easily halve and pit cherries, run a sharp paring knife all the way around the cherry lengthwise, then twist the two halves apart. They'll separate cleanly. Use your knife or fingers to flick the pit out of the half in which it's seated, and presto! Pitted halved cherry.
The bread is a simple country blonde from Flour Water Salt Yeast. Our super super, Peter, gave us a free window AC unit that one of his super friends didn't need, which will go a long way in increasing the frequency with which I bake, roast, and broil this summer. The bread was baked at 475, and broiled at an even higher temperature. Without the AC on, the apartment was nearly intolerable.
And now, have a bonus recipe for really good cookies.
Sesame-apricot cookies with the Momofuku technique
1 cup butter, room temperature
3/4 c white sugar
3/4 c packed brown sugar (I prefer light)
2 eggs
3/4 tsp vanilla extract (if you're not using almond, use a full tsp)
1/4 tsp almond extract
2 c flour
a scant 1 1/2 tsp salt
2 tsp baking powder
1 tsp baking soda
1/4 tsp cinnamon (can up to 1/2 for a more prominent flavor!)
1 c oats, not instant
Total of 2 c chopped dried apricots, white sesame seeds, and black sesame seeds, in your preferred ratios
Cream the butter and sugars in a stand mixer, if you have one. Add the eggs and vanilla and mix just until combined, scraping down the sides. Turn the stand mixer to medium-high speed (setting 4 on my KitchenAid) for a full 10 minutes, stopping halfway through to scrape down the sides. Add the flour, baking powder, baking soda, cinnamon, and salt, mixing just until combined, scraping down the sides. Finally, gently fold in the nuts/chocolate/fruit. Cover and chill the dough for at least 1.5 hours.
Preheat your oven to 375 F (original recipe on which I based this suggests 400, but I found that a bit too hot). Scoop out 1.5-tbsp scoops of dough onto a large cookie sheet, leaving at least 2 inches of space around each scoop. Grind a little kosher salt over the top. Bake 8-11 minutes. Note that the browning will start at the edges and rapidly move into the center; these cookies go from underdone to overdone in literally under a minute! Cool completely on the cookie sheet before serving.
*WOOOOOOOOO**
**Except I've yet to actually practice, sooo...
Saturday, April 12, 2014
Riding the High
Smiling medical students: not something one often encounters, not unless you count the "it's-early-in-the-morning-but-I-need-to-be-enthusiastic-to-get-honors" fixed grin. Match Day was a different story. My classmates matched incredibly well, and they all looked so, so happy. It'll continue to warm my cold, puckered ticker for some time; I'm smiling now just thinking of it.
Match Day was three weeks ago now, but my last day of medical school wasn't until yesterday. I've been on a second rotation in the medical ICU and loved it just as much as the first one, perhaps more (it helped that neurology knowledge came in handy). I'm not sure whether to be excited or not. Med school was frustrating, exhausting, embarrassing, devastatingly expensive, and totally awesome. Intern year is supposed to be the first three of those. I'll let you know in July.
To commemorate the Fin de Med School, I made these MICU-themed lime cream tarts. The writing is messier than I would have liked because I forgot to pick up some 12-cc syringes from the utility cart on my way home and had to use a much too large one that I had at home. It was much harder to control the flow of chocolate.


To make these, fill pre-baked tart shells (or shell) with slightly warm curd, then refrigerate the whole thing until the curd is firm or sliceable. I view using condensed milk for citrus pies as cheating; the turnabout is that it's a little harder to get a pie that slices instead of oozing.
Match Day was three weeks ago now, but my last day of medical school wasn't until yesterday. I've been on a second rotation in the medical ICU and loved it just as much as the first one, perhaps more (it helped that neurology knowledge came in handy). I'm not sure whether to be excited or not. Med school was frustrating, exhausting, embarrassing, devastatingly expensive, and totally awesome. Intern year is supposed to be the first three of those. I'll let you know in July.
To commemorate the Fin de Med School, I made these MICU-themed lime cream tarts. The writing is messier than I would have liked because I forgot to pick up some 12-cc syringes from the utility cart on my way home and had to use a much too large one that I had at home. It was much harder to control the flow of chocolate.
To make these, fill pre-baked tart shells (or shell) with slightly warm curd, then refrigerate the whole thing until the curd is firm or sliceable. I view using condensed milk for citrus pies as cheating; the turnabout is that it's a little harder to get a pie that slices instead of oozing.
Lime curd
3-4 limes, or enough for 1/2 cup juice
1 to 1 1/4 cups white sugar (I like a more sour curd and use less sugar)
4 oz (1/4 lb, or 1 stick) unsalted butter, room temperature
4 eggs, room temperature
pinch salt
To fully juice the limes, warm them slightly in the microwave before squeezing. Using an electric mixer or stand mixer, cream the butter and sugar with the zest from 4 limes. Add the eggs 1 at a time, mixing until just blended, then add the lime juice and salt and mix until just combined.
Pour into a saucepan and cook over medium-low heat, whisking constantly, until thickened. If you have a food thermometer, this will occur at about 175 F; otherwise, cook until it is just below a simmer. This will take slightly longer if you used less sugar, but generally will be 10-15 minutes. Allow to cool until still warm, but easily handled. Pour into the cooled crust and allow to cool fully to room temperature, then refrigerate. I find that the pie cuts best after setting in the fridge for at least an hour, but it's not necessary. To mix it up, toss some fresh mint into the curd as it cools (and fish out the herbs afterwards) or add some cinnamon, cloves, or black pepper.
Sunday, March 23, 2014
Parthas
This may come as a shock: being an intern is rough. I absolutely loved my sub-internship*, but it's been an exercise in accepting the fact that cooking healthfully and exercising regularly is hard when you're a junior doctor. I mostly ended up eating Way Too Much Thai Food, oatmeal, and huge bunches of chard cooked with garlic.

There's nothing better than garlicky, tender chard, except for garlicky, tender chard eaten in the presence of someone with no sense of smell. Or kale. Or green beans. How I love green beans (which are called grüne Bohne in German).
I did have time to make some awesome carrot cake cupcakes, sweet potato pie, and pizza with a new crust recipe from Flour Water Salt Yeast. The texture of this crust was worlds better than that of my usual. I can't get away from the white wine and molasses from my old recipe, though. Next time, I'll try the FWSY process with those ingredients included; hopefully it won't much alter the structure of the dough.


The sweet potato pie... well, I remembered the recipe at the time I made it, which was about two weeks ago. At this point, all I know is that I used about a pound and a half of slow-roasted sweet potato, three eggs--yolks directly mixed into the batter, whites whipped until stiff and gently folded in--brown sugar, cayenne, cinnamon, cloves, and no flour whatsoever. The crust has oats and wheat bran in it.

To celebrate Match Day** and our three-year marriage anniversary, Andy and I walked the length of Manhattan today (and totally got one-upped as soon as we got home and saw the NYC subreddit), starting at 215th St., heading down Broadway until 60th St., and continuing down 7th Avenue until we hit SoHo.
South Seaport at last! It took us about five hours, including stops for breakfast (diner fare in Harlem), lunch (sushi in Chelsea), and caffeine (once under the overpass just north of Columbia, once in the Financial District). Perhaps doing this walk after a big deadlift day was less than intelligent; my thighs are informing me that victory tastes bittersweet.
*in which we get long coats and pagers and prescribing privileges (with oversight, of course) and pretend to be interns
**Possibly the happiest day of my life: first choice, and I get to stay in New York one more year so as not to abandon Andy while he finishes his PhD!
There's nothing better than garlicky, tender chard, except for garlicky, tender chard eaten in the presence of someone with no sense of smell. Or kale. Or green beans. How I love green beans (which are called grüne Bohne in German).
I did have time to make some awesome carrot cake cupcakes, sweet potato pie, and pizza with a new crust recipe from Flour Water Salt Yeast. The texture of this crust was worlds better than that of my usual. I can't get away from the white wine and molasses from my old recipe, though. Next time, I'll try the FWSY process with those ingredients included; hopefully it won't much alter the structure of the dough.
The sweet potato pie... well, I remembered the recipe at the time I made it, which was about two weeks ago. At this point, all I know is that I used about a pound and a half of slow-roasted sweet potato, three eggs--yolks directly mixed into the batter, whites whipped until stiff and gently folded in--brown sugar, cayenne, cinnamon, cloves, and no flour whatsoever. The crust has oats and wheat bran in it.
To celebrate Match Day** and our three-year marriage anniversary, Andy and I walked the length of Manhattan today (and totally got one-upped as soon as we got home and saw the NYC subreddit), starting at 215th St., heading down Broadway until 60th St., and continuing down 7th Avenue until we hit SoHo.
 |
*in which we get long coats and pagers and prescribing privileges (with oversight, of course) and pretend to be interns
**Possibly the happiest day of my life: first choice, and I get to stay in New York one more year so as not to abandon Andy while he finishes his PhD!
Wednesday, February 26, 2014
Scone of Stone
I coincidentally ran across this while trying to figure out what the incidences of sporadic Wilson's disease, hemochromatosis, and alpha-1 antitrypsin disease are. It's nifty to think that one could get to know all Wilson's disease patients in an entire country. Unfortunately, neither this article nor any other clarified exactly what those incidences are ("rare" and "extremely rare" were common phrases, though!). The paper for which I needed that data has since been completed, but I'd still like to know!
The scone is a tricky beast. Traditional English scones are light and fluffy and just a little sweet. Scottish scones* are a little denser and nuttier, often with oat or barley flour, but still just lightly sweet. American scones, on the other hand? Heavy, cloying, texturally hit-or-miss... the long and the short of it is that if I'm going to blow my daily calorie budget (and several dollars) on a pastry from 71 Irving Place or Starbucks or where have you, I'm going for something that is less likely to taste like a sugary rock.
Unfortunately for my pride, I am guilty of crafting the occasional sugary rock myself. Not so this batch:

Based on this recipe, these were flaky poufs of caraway and hazelnut and apricot and fig. 10/10, would blow daily calorie budget on again. I reduced the sugar in the recipe, added about a teaspoon (maybe less) of caraway seeds, and made a Seville orange glaze (just mix the juice with confectioner's sugar until desired consistency is reached). The unique Seville orange flavor was absolutely perfect. Next time, though, I want to avoid another layer of sweetness and will attempt to incorporate the juice directly into the dough.

*Scotland is, of course, the origin of this pastry (which, when pronounced the Scottish way, rhymes with "gone")
The scone is a tricky beast. Traditional English scones are light and fluffy and just a little sweet. Scottish scones* are a little denser and nuttier, often with oat or barley flour, but still just lightly sweet. American scones, on the other hand? Heavy, cloying, texturally hit-or-miss... the long and the short of it is that if I'm going to blow my daily calorie budget (and several dollars) on a pastry from 71 Irving Place or Starbucks or where have you, I'm going for something that is less likely to taste like a sugary rock.
Unfortunately for my pride, I am guilty of crafting the occasional sugary rock myself. Not so this batch:
Based on this recipe, these were flaky poufs of caraway and hazelnut and apricot and fig. 10/10, would blow daily calorie budget on again. I reduced the sugar in the recipe, added about a teaspoon (maybe less) of caraway seeds, and made a Seville orange glaze (just mix the juice with confectioner's sugar until desired consistency is reached). The unique Seville orange flavor was absolutely perfect. Next time, though, I want to avoid another layer of sweetness and will attempt to incorporate the juice directly into the dough.
*Scotland is, of course, the origin of this pastry (which, when pronounced the Scottish way, rhymes with "gone")
Monday, February 17, 2014
Think of Iceland
The planning is underway for Hannah and Andy's Great Iceland Tour of 2014! We're going on a nine-day trip to celebrate my impending graduation. Iceland has long been on my list of places to visit*; while the car rental and gas prices will be pretty steep, the actual flight and recreation--meaning days and days of hiking and soaking in volcanic hot springs--are quite affordable. It's still chilly in early May, which means that Andy can career around the countryside with me without breaking a sweat (he's a freak of nature who turns beet-red at the mere thought of actual warm weather).
I'm going for the geography but plan to take the opportunity to try some new and different foods. Aside from the traditional Icelandic dishes of fermented shark and sheep's head and dried puffin (the first of which has been described as truly foul), the famous Icelandic hot dog, eaten with "the works" (eina með öllu), is the local delicacy of choice. Oh, and a strained yogurt-type thing called skyr. The idea of eating whale doesn't sit right with me; I'll probably skip that.
I made the huge mistake of baking fresh bread again, this time a straightforward overnight whole-wheat boule.


The recipe came directly from Deborah Madison's Greens cookbook. It's got some great recipes with unique concepts, but I frequently have issues with the proportions of herbs and seasonings to whatever protein or carb makes up the bulk of the dish. In this case, the recipe only called for three eggs against a cascade of cornichons, capers, celery, and--less alliteratively--red onion. There were so many vegetables and so much remoulade that, while the spice level was decent, the eggs were practically lost. I doubled the number of eggs and sprinkled in some more seasoning and a little more onion, celery, and pickle, and it was perfect. The spicy watercress really makes this dish, too; if you can find it in your local grocery, I highly recommend it over lettuce or spinach.
*Other hot items on the list: Mongolia (where I wish to go hawking on a bicycle, since I am not an experienced horseback rider), Antarctica, Socotra Island, Turkey (especially Cappadocia), South Korea, Croatia
I'm going for the geography but plan to take the opportunity to try some new and different foods. Aside from the traditional Icelandic dishes of fermented shark and sheep's head and dried puffin (the first of which has been described as truly foul), the famous Icelandic hot dog, eaten with "the works" (eina með öllu), is the local delicacy of choice. Oh, and a strained yogurt-type thing called skyr. The idea of eating whale doesn't sit right with me; I'll probably skip that.
I made the huge mistake of baking fresh bread again, this time a straightforward overnight whole-wheat boule.
What we didn't devour for breakfast with butter and blackberry jam I grilled for Creole egg salad and watercress sandwiches.
The recipe came directly from Deborah Madison's Greens cookbook. It's got some great recipes with unique concepts, but I frequently have issues with the proportions of herbs and seasonings to whatever protein or carb makes up the bulk of the dish. In this case, the recipe only called for three eggs against a cascade of cornichons, capers, celery, and--less alliteratively--red onion. There were so many vegetables and so much remoulade that, while the spice level was decent, the eggs were practically lost. I doubled the number of eggs and sprinkled in some more seasoning and a little more onion, celery, and pickle, and it was perfect. The spicy watercress really makes this dish, too; if you can find it in your local grocery, I highly recommend it over lettuce or spinach.
*Other hot items on the list: Mongolia (where I wish to go hawking on a bicycle, since I am not an experienced horseback rider), Antarctica, Socotra Island, Turkey (especially Cappadocia), South Korea, Croatia
Subscribe to:
Posts (Atom)